Forward Correspondence
Forward Correspondence
1. Open Inbox Correspondence
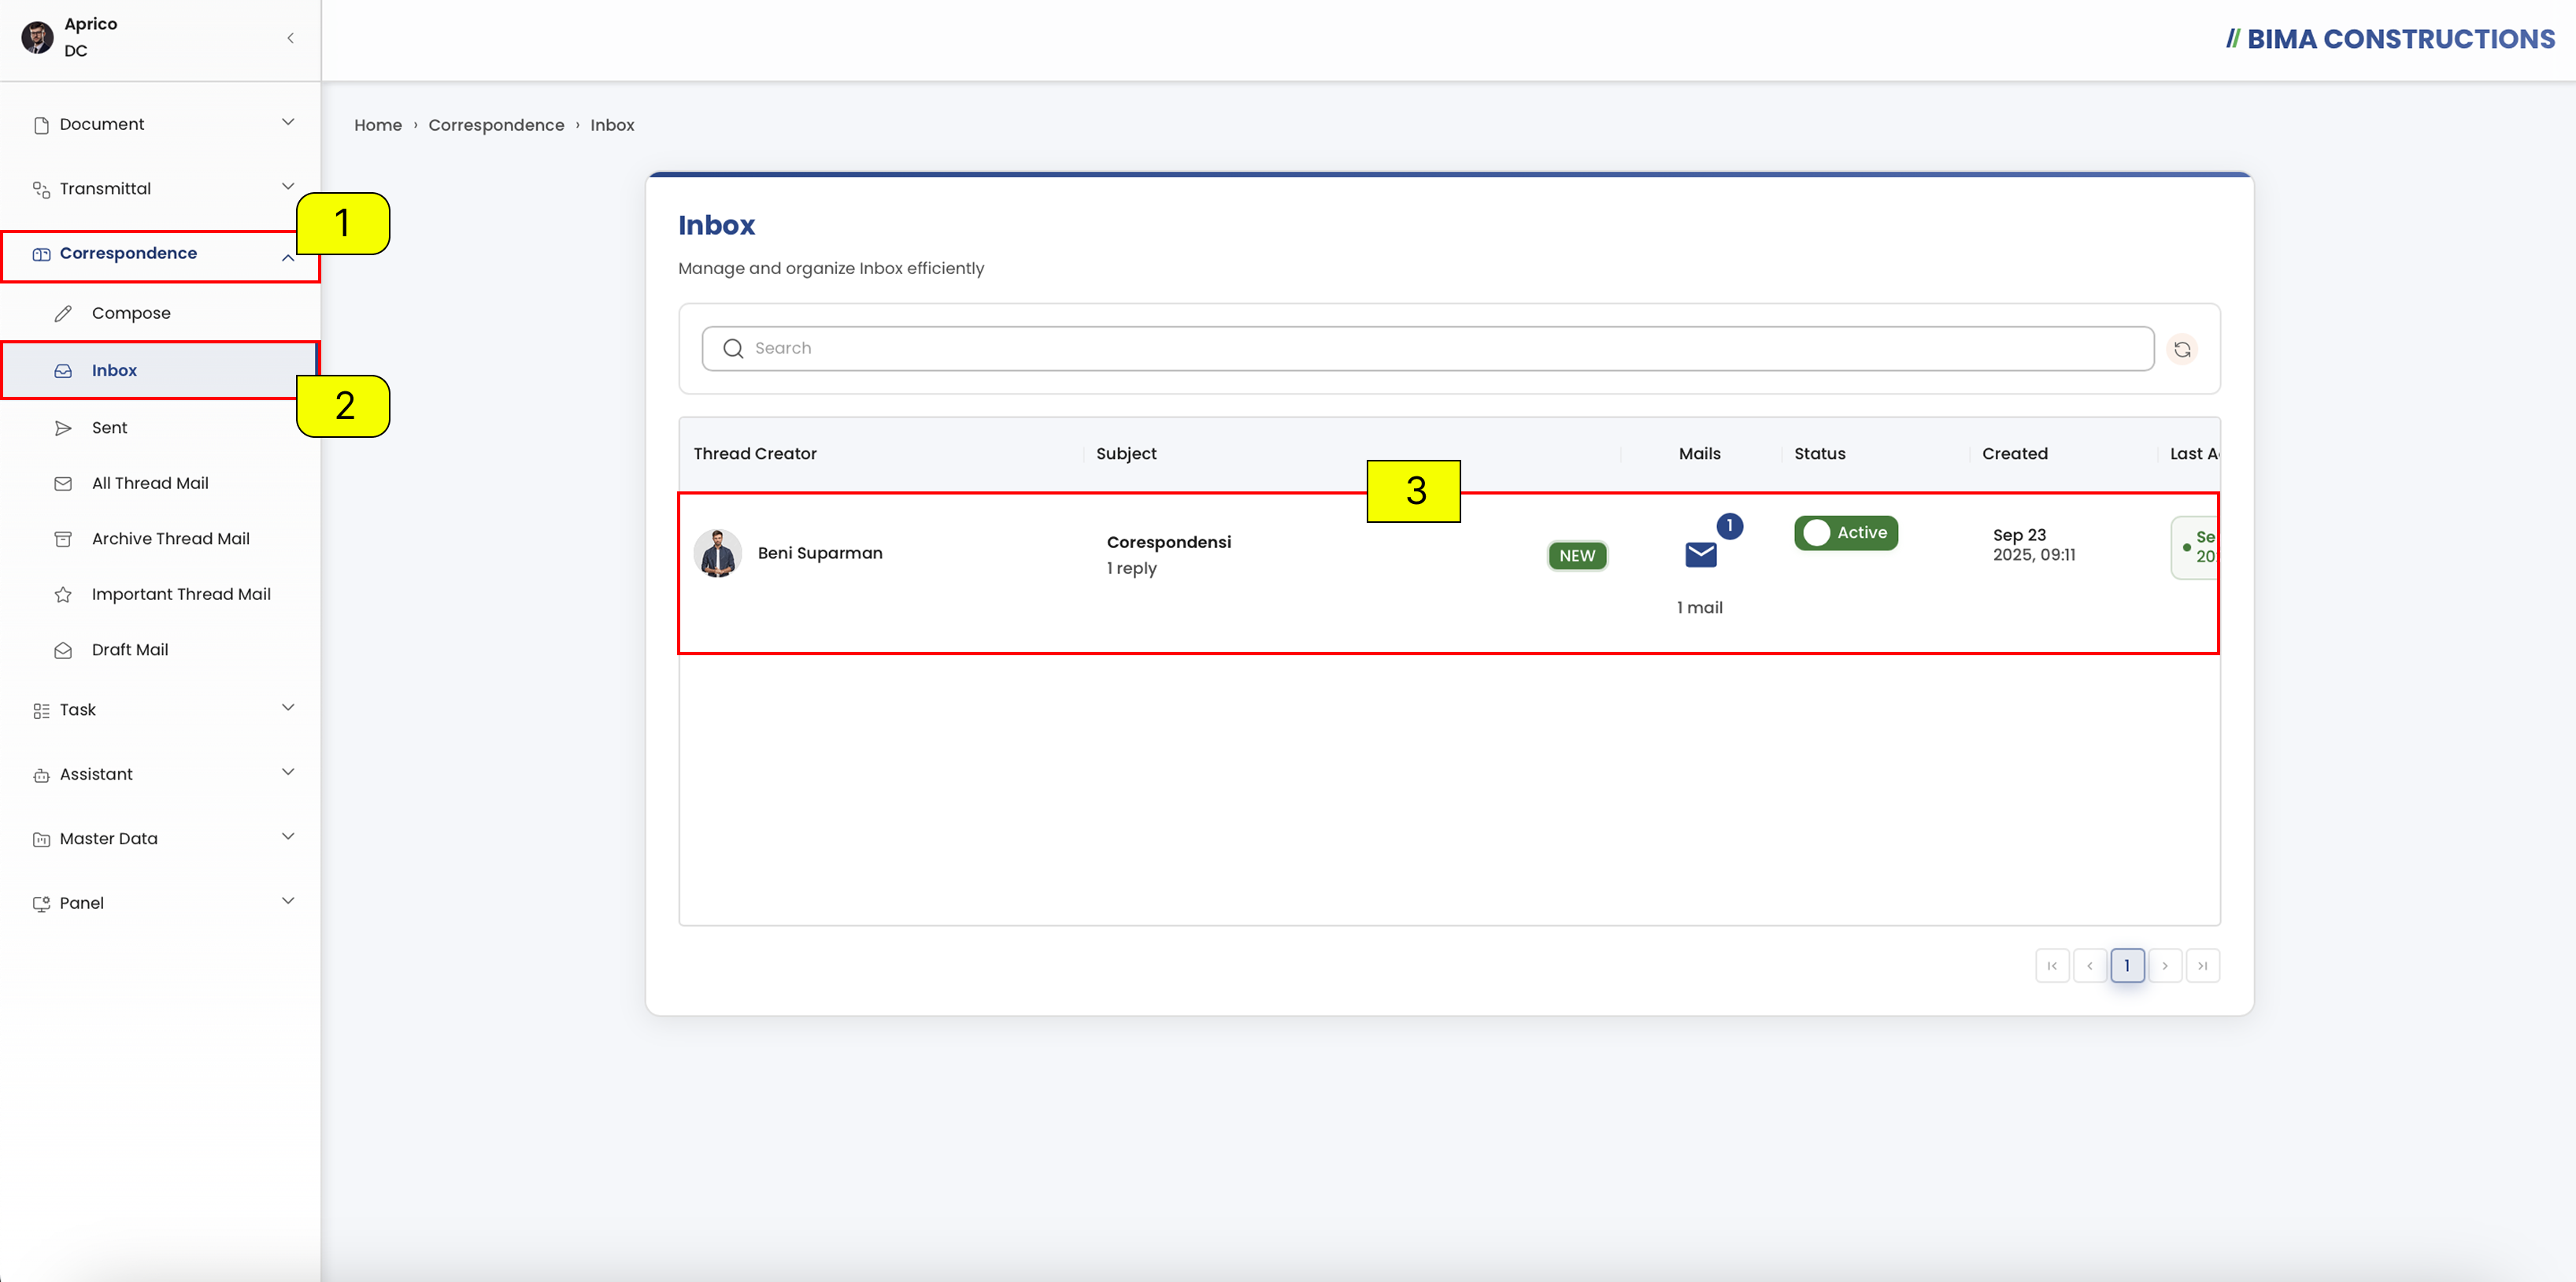
- The Document Controller can click on the
Correspondencemenu button to expand its submenu. - The Document Controller can select the
Inboxmenu to view all received correspondences. - The Document Controller can click on the listed correspondence thread in the inbox to open and view its details.
2. Open Mail Correspondence
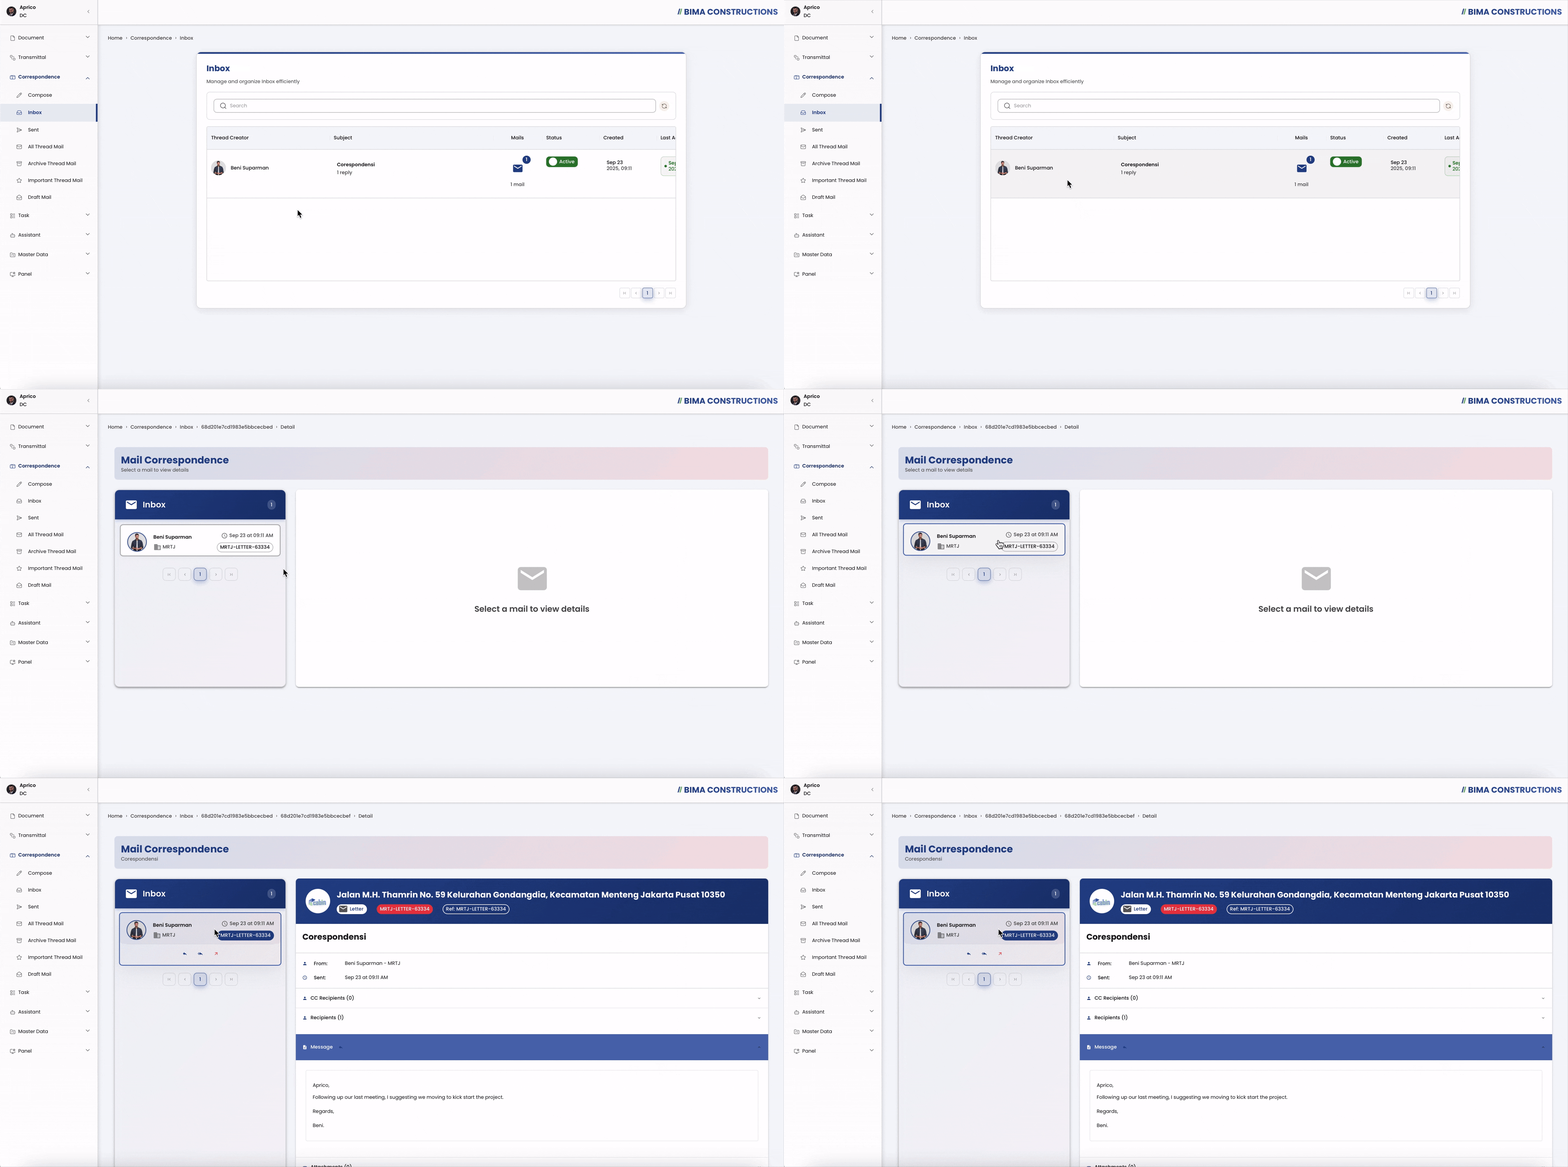 On this page, a list of incoming correspondence threads will be displayed. The Document Controller can click on the thread they want to open, then select the email within the thread. Once clicked, the message details such as sender, recipient, content, and attachments will be shown on the right side of the screen.
3. Forward Correspondence
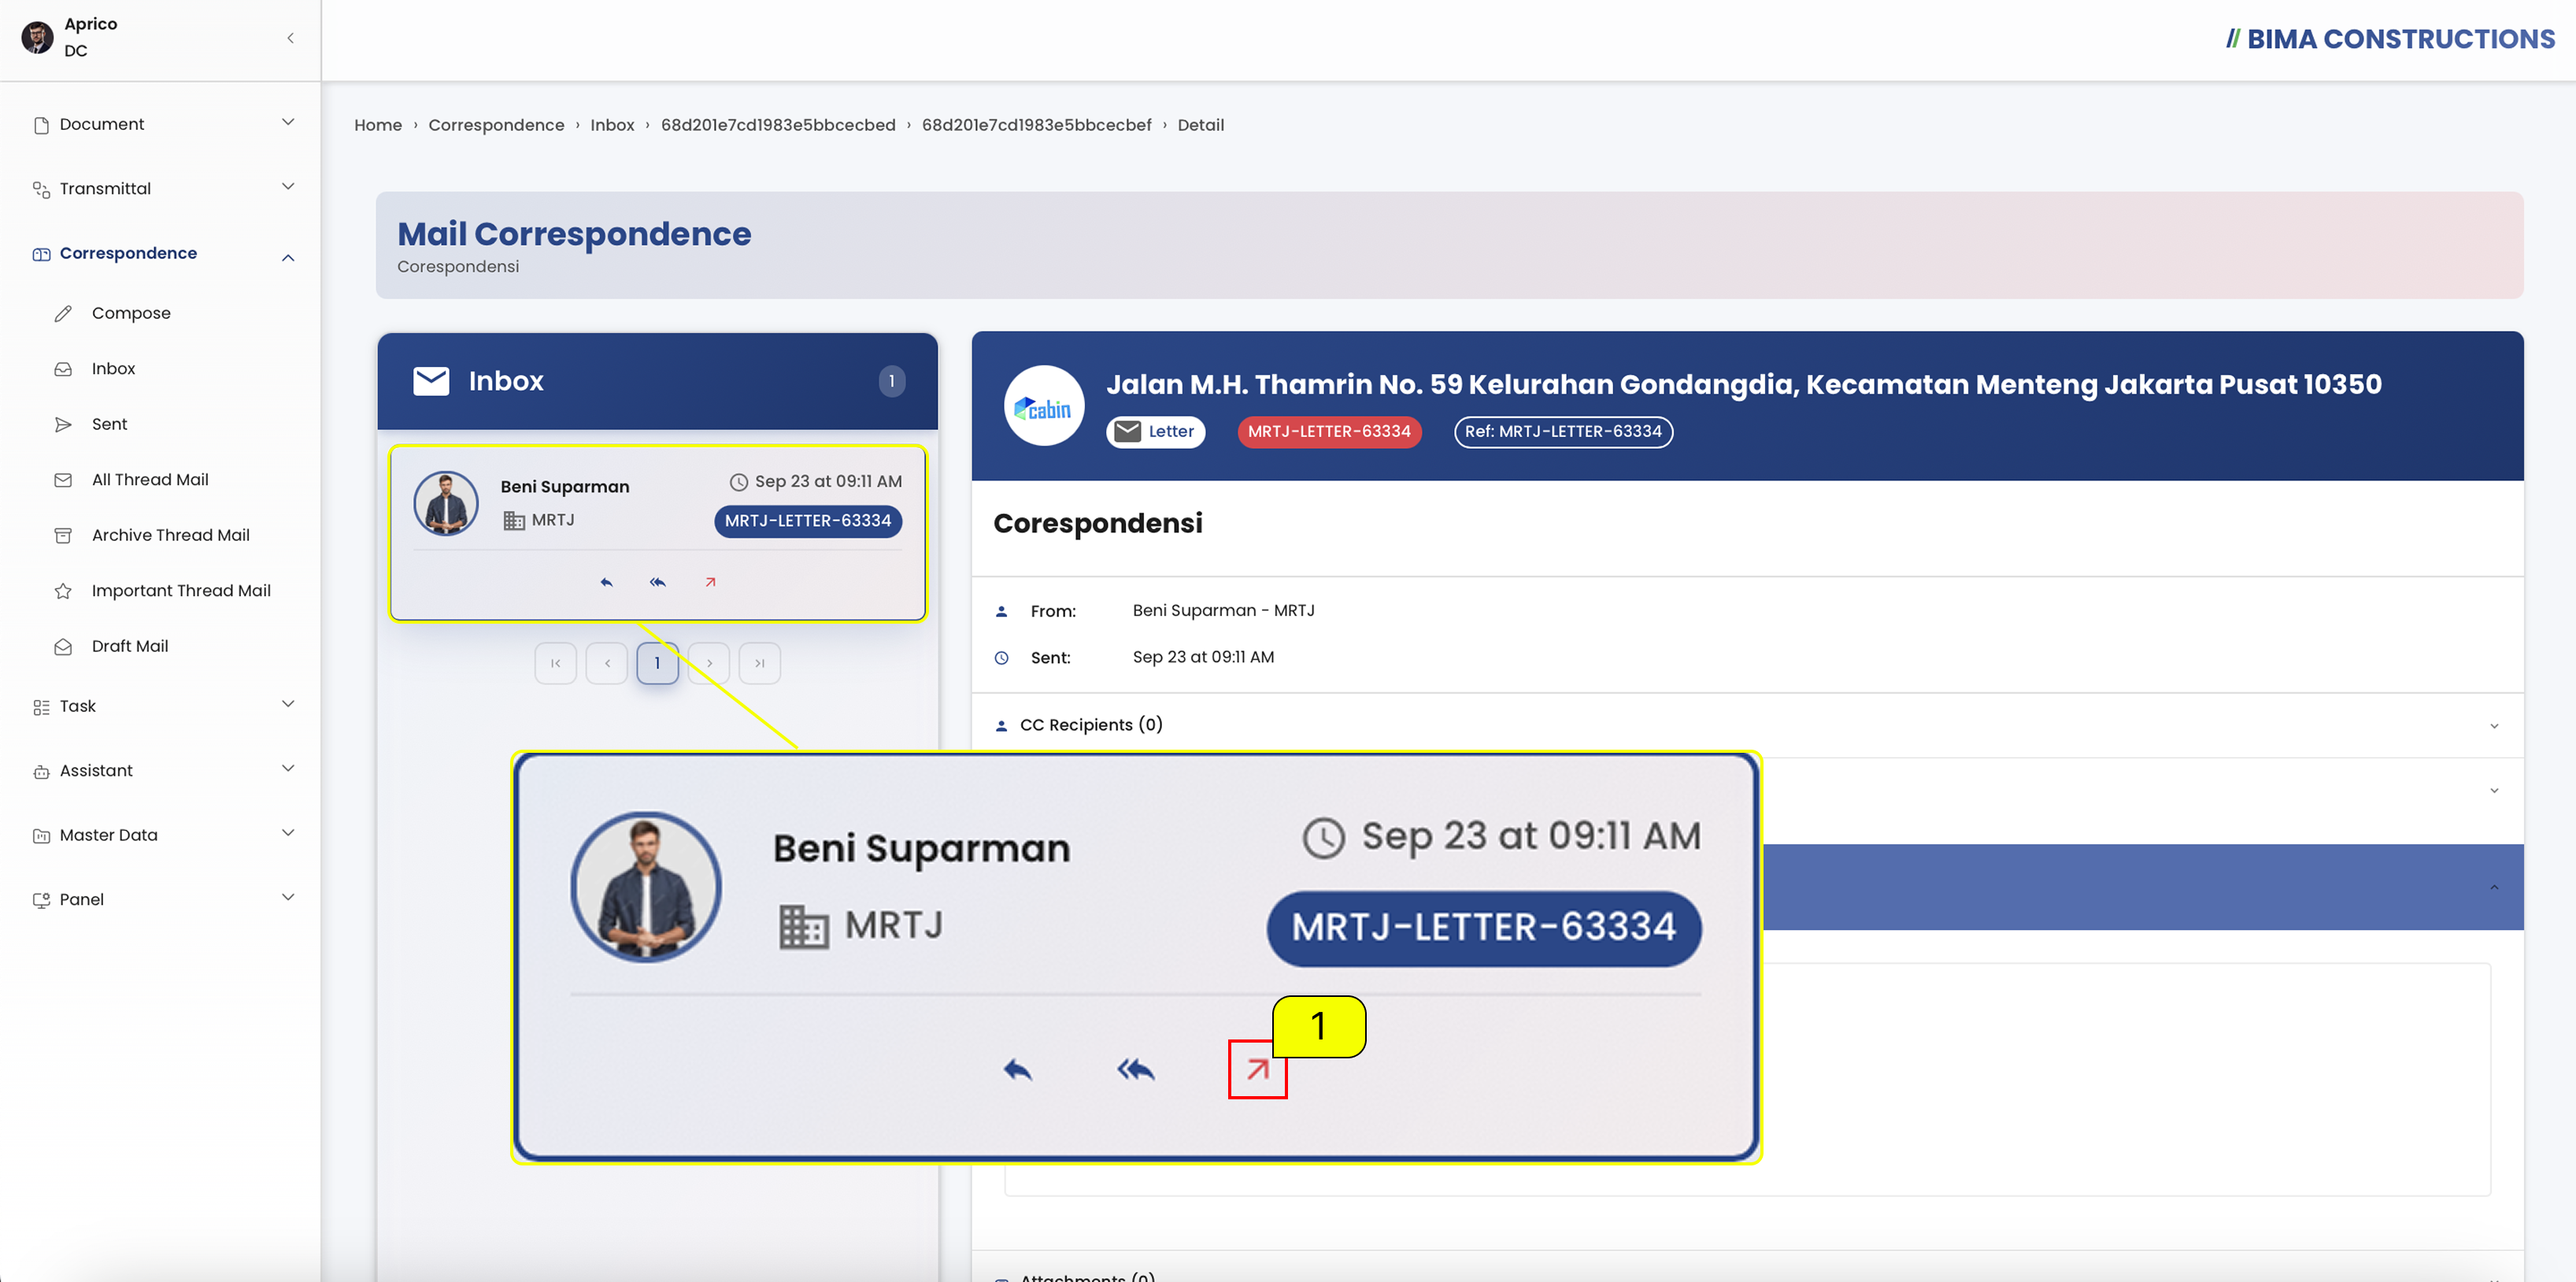 The Document Controller can forward a message by clicking the Forward button marked with number
 1. This allows the correspondence to be shared with other parties who were not included in the original recipients.
4. Fill in the Correspondence Content
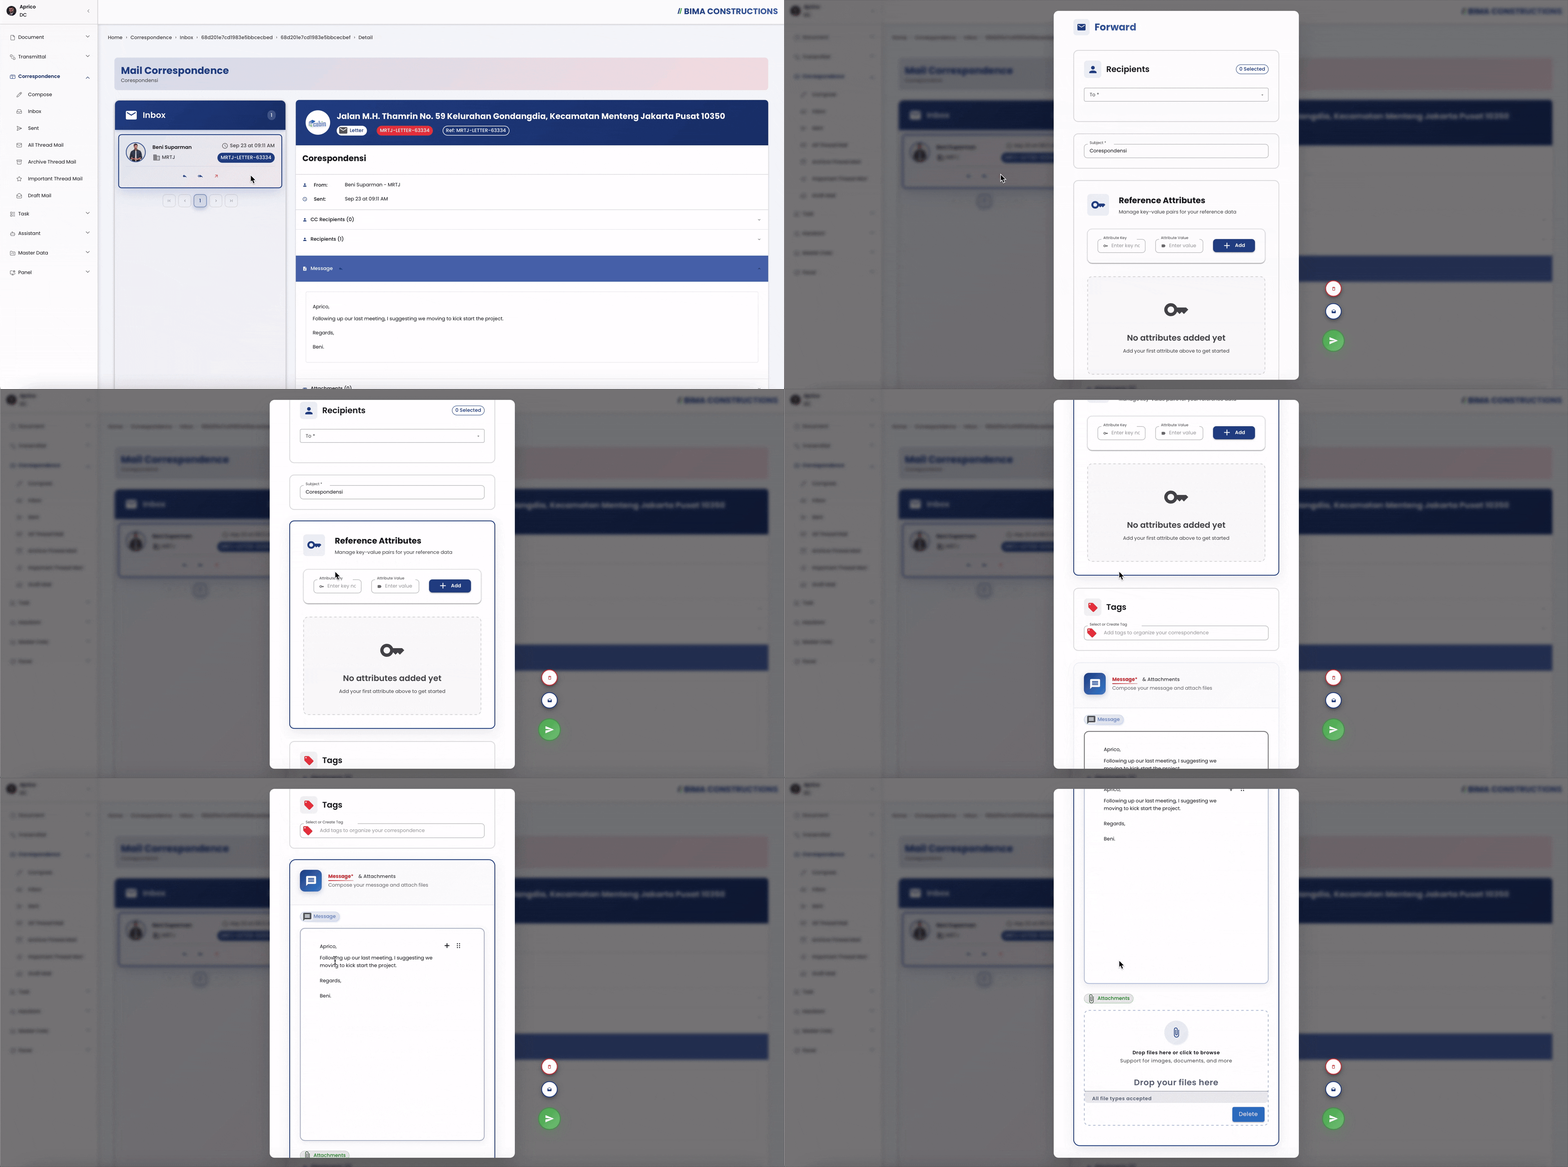 The Document Controller can still look at the process for Fill in the Correspondence Content using this link Make a New Correspondence
5. Forward Successfully
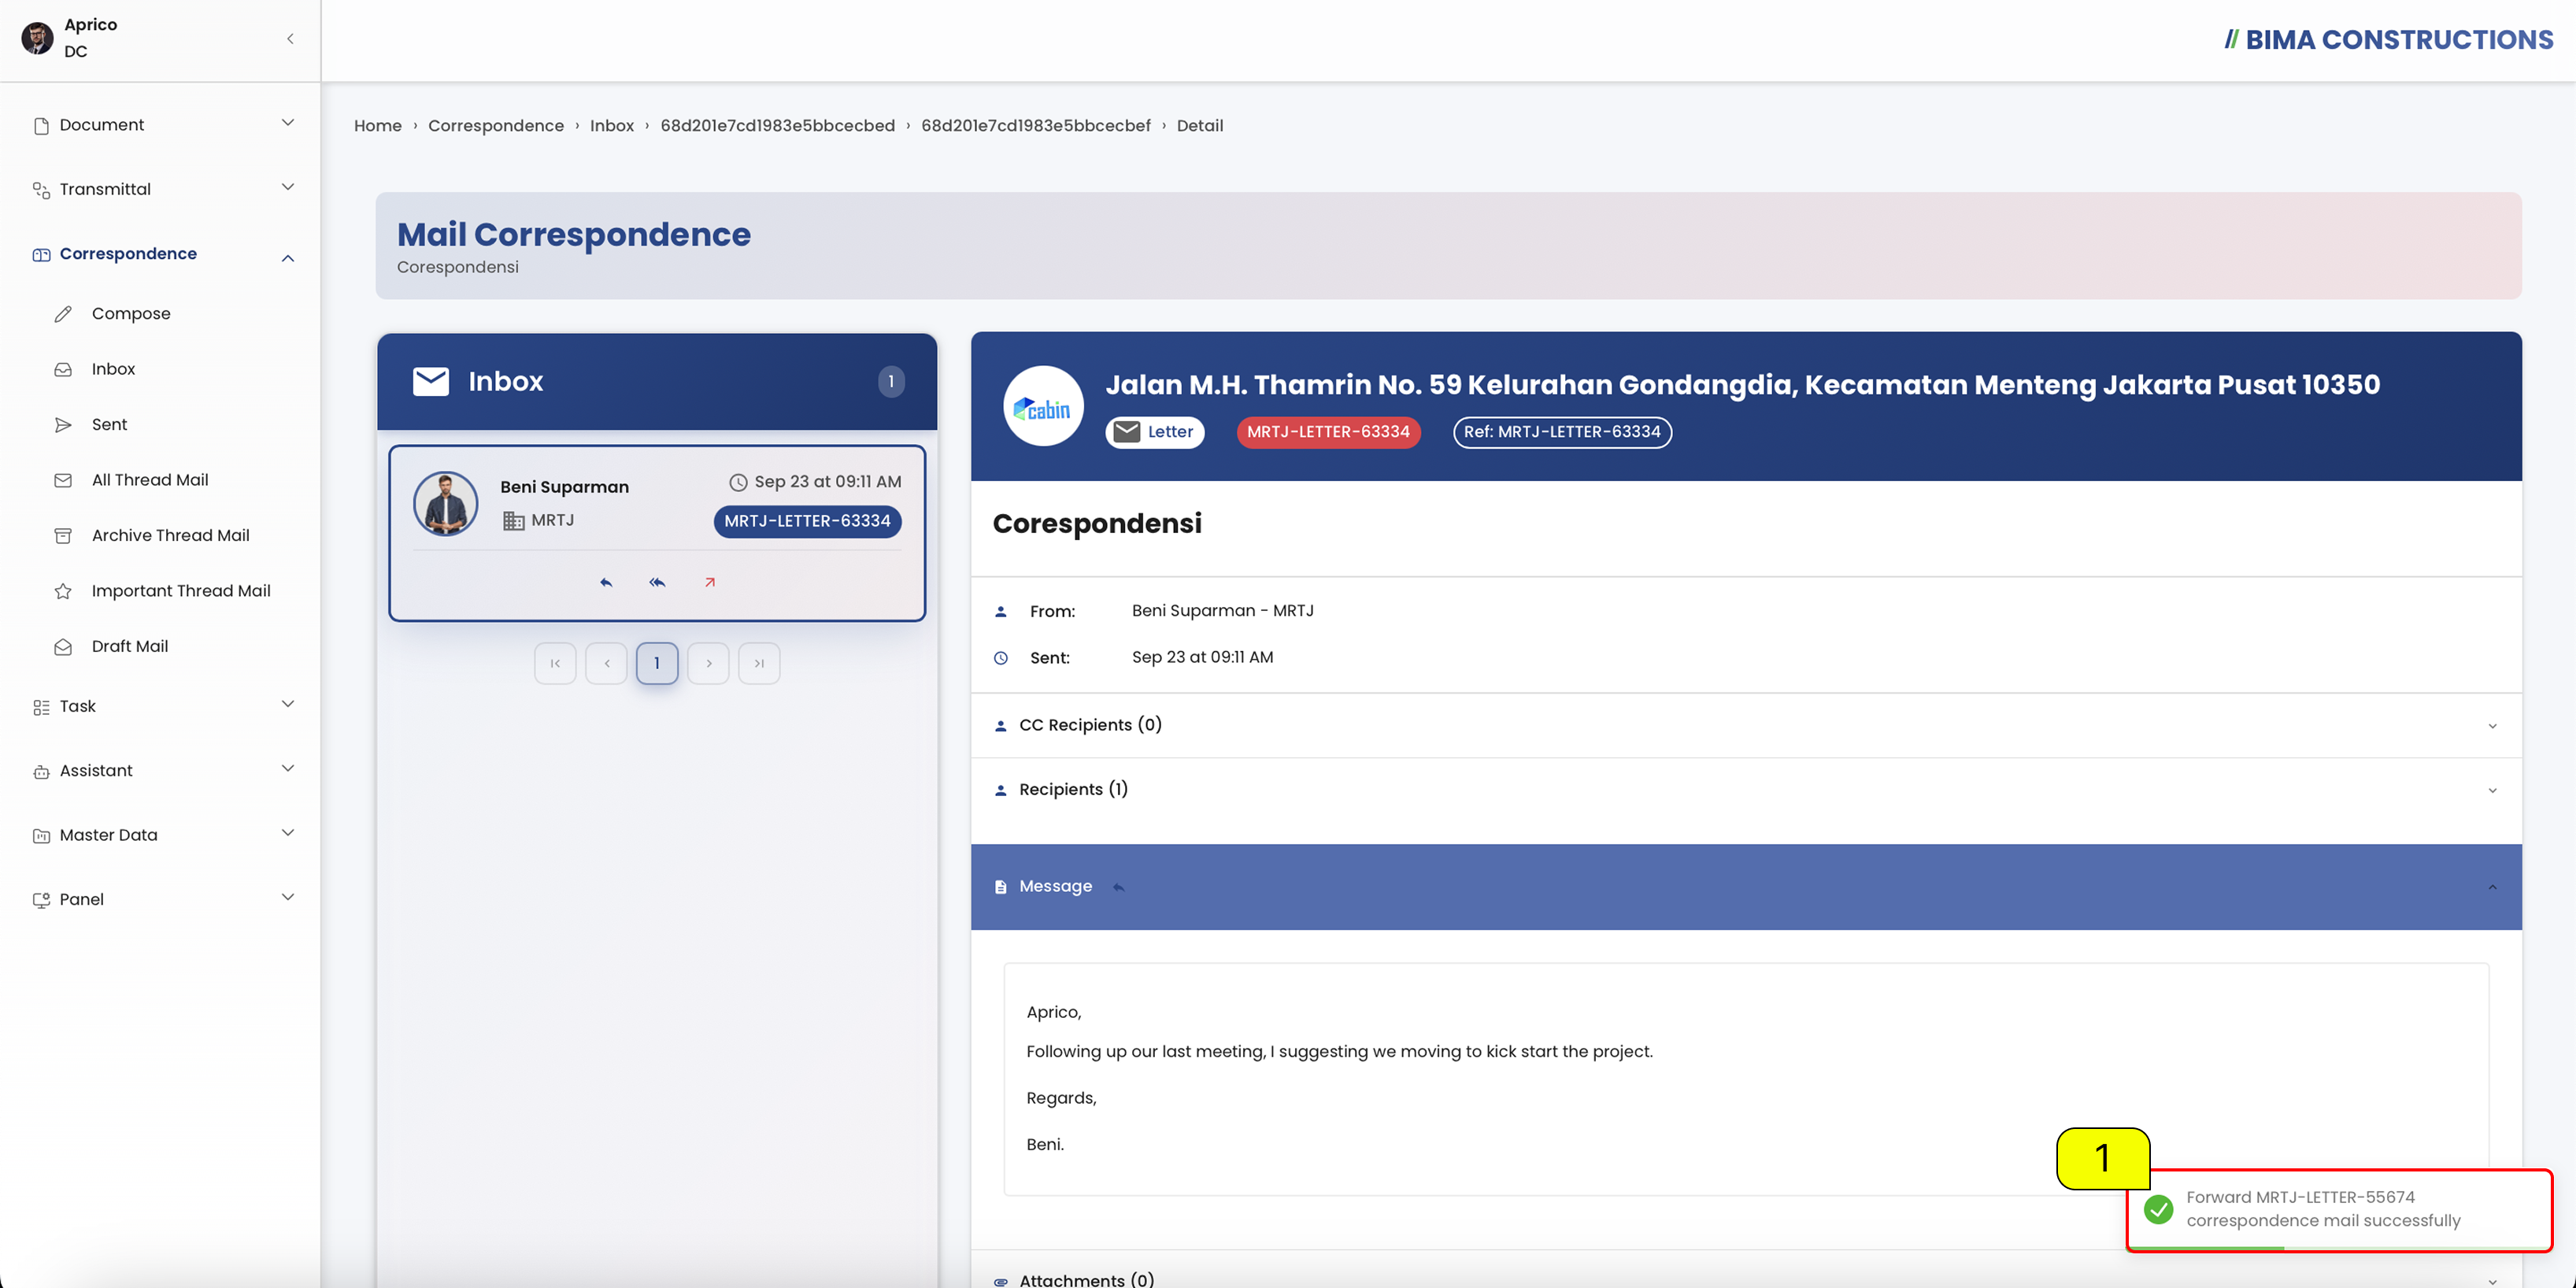 After finishing the forward process, a notification will appear at the bottom right corner of the screen saying
 Forward [Name Letter] Successfully.
6. Check in Correspondence Sent
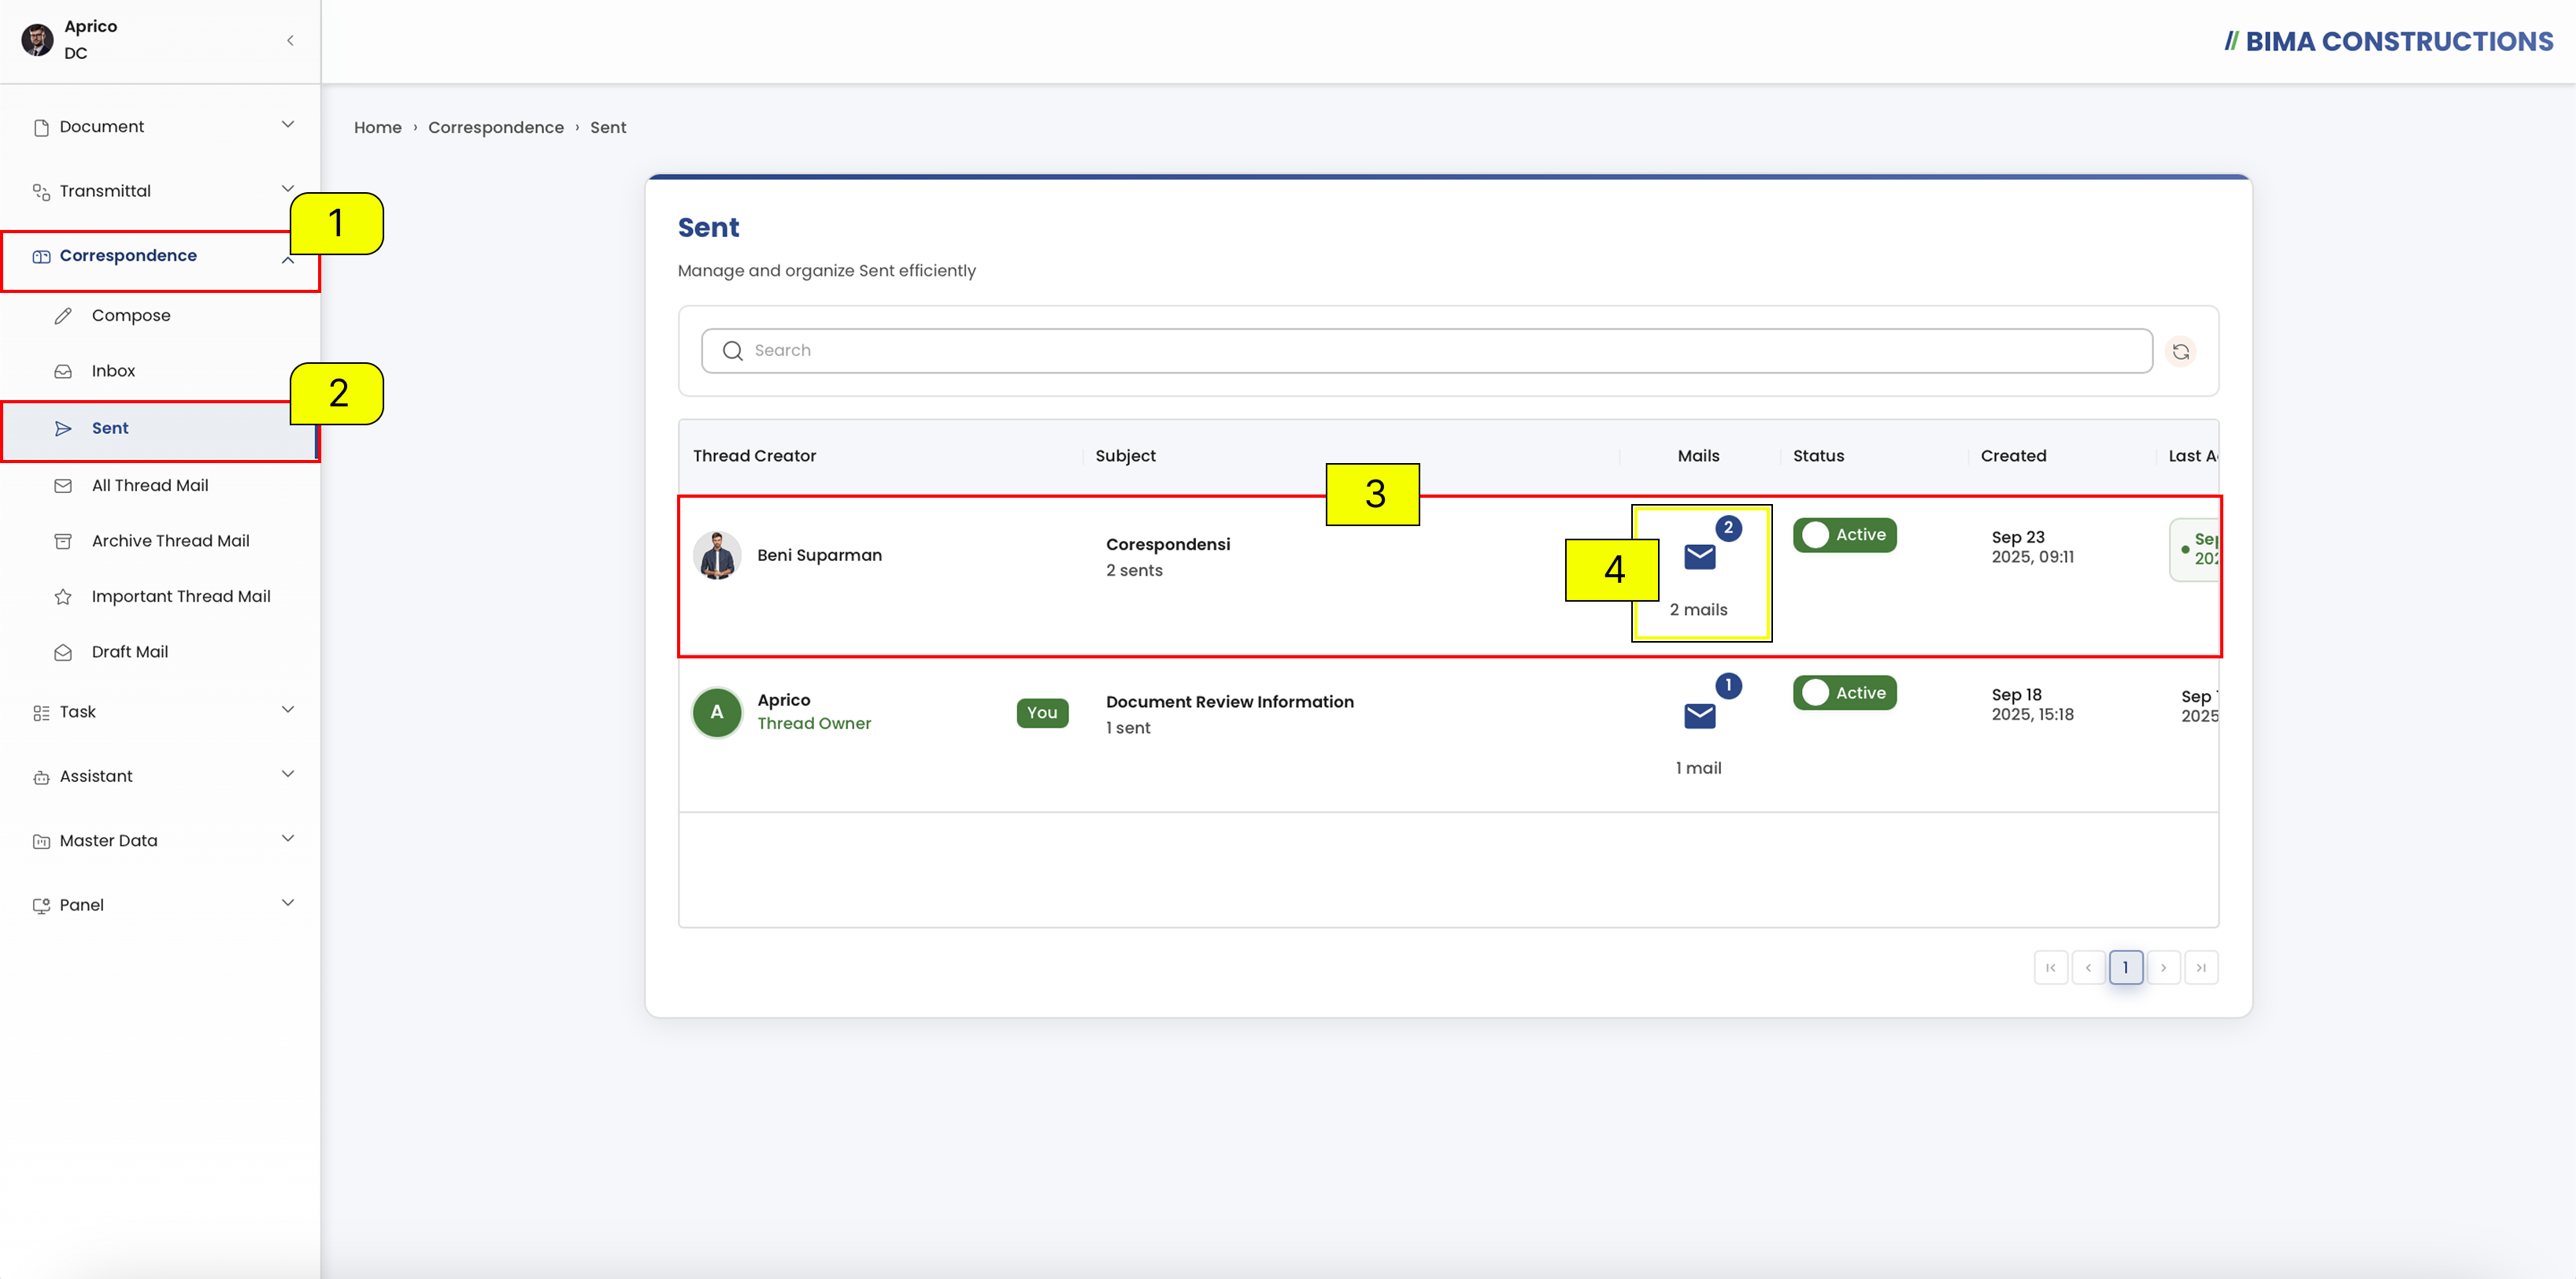
- Click the Correspondence menu (
1) on the sidebar. - Select the Sent submenu (
2) to view the list of sent correspondences. - In section (
3), the DC can check the details of the sent message such as sender, subject, status, creation time, and more. - In section (
4), if there are multiple messages sent within the same thread creator, the number of mails will automatically increase.
7. Check in Email
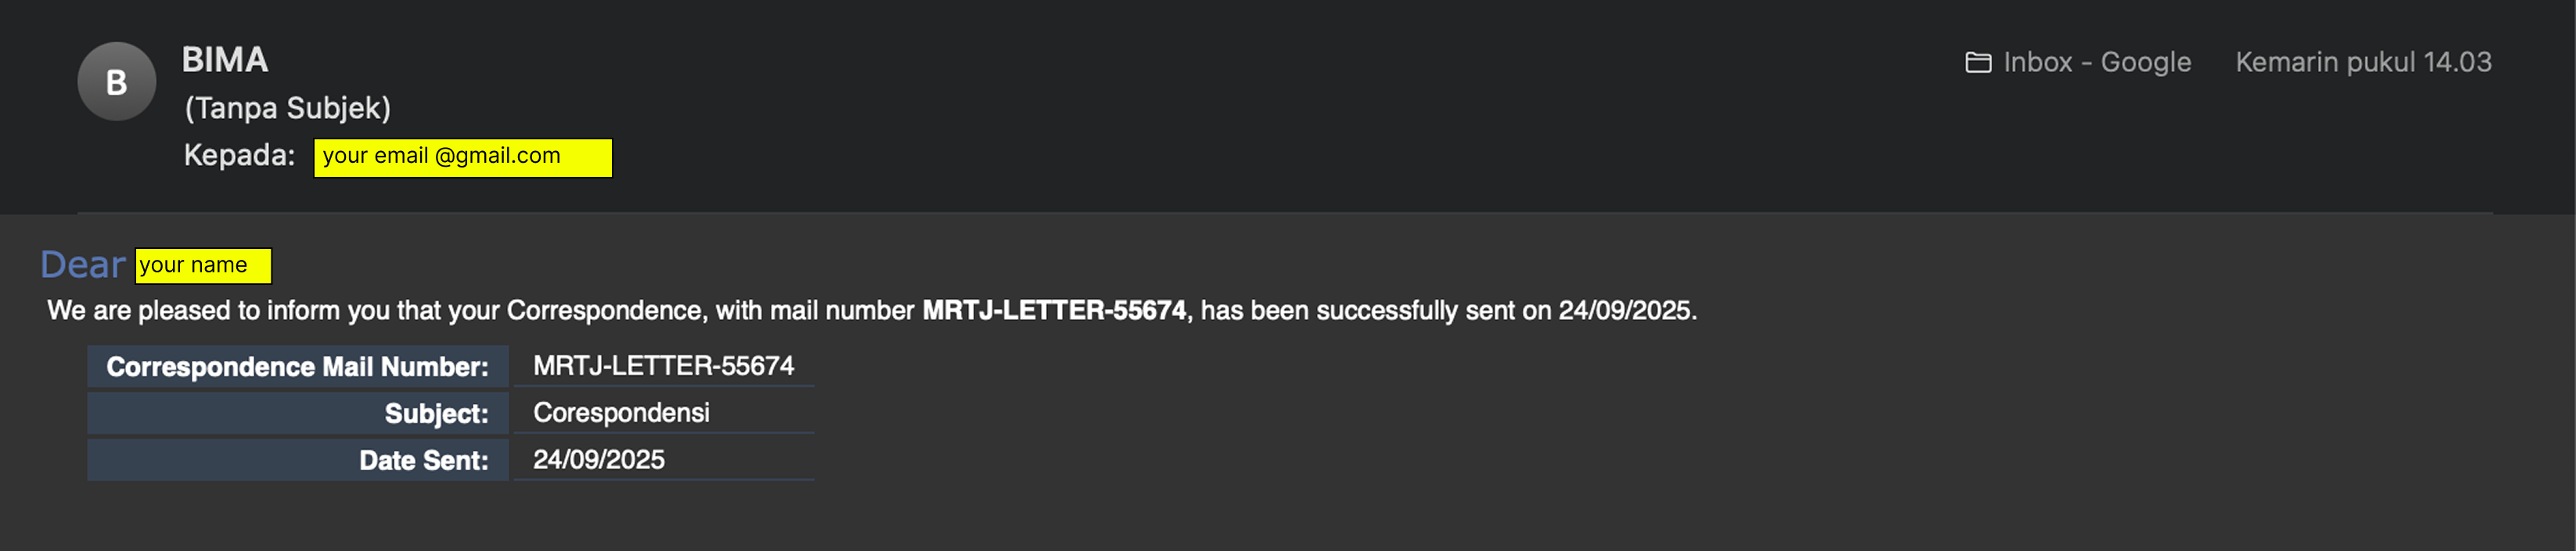 If the correspondence is successfully sent, the system will also send a confirmation email to the registered address.