Create Document
Read Below First
To be able to create a document, a USER must have a Document Control role. If the USER does not have access problems even though they are using the correct account, the USER can contact the admin regarding the problematic access rights.
Create Document
1. Go To Create Document Page
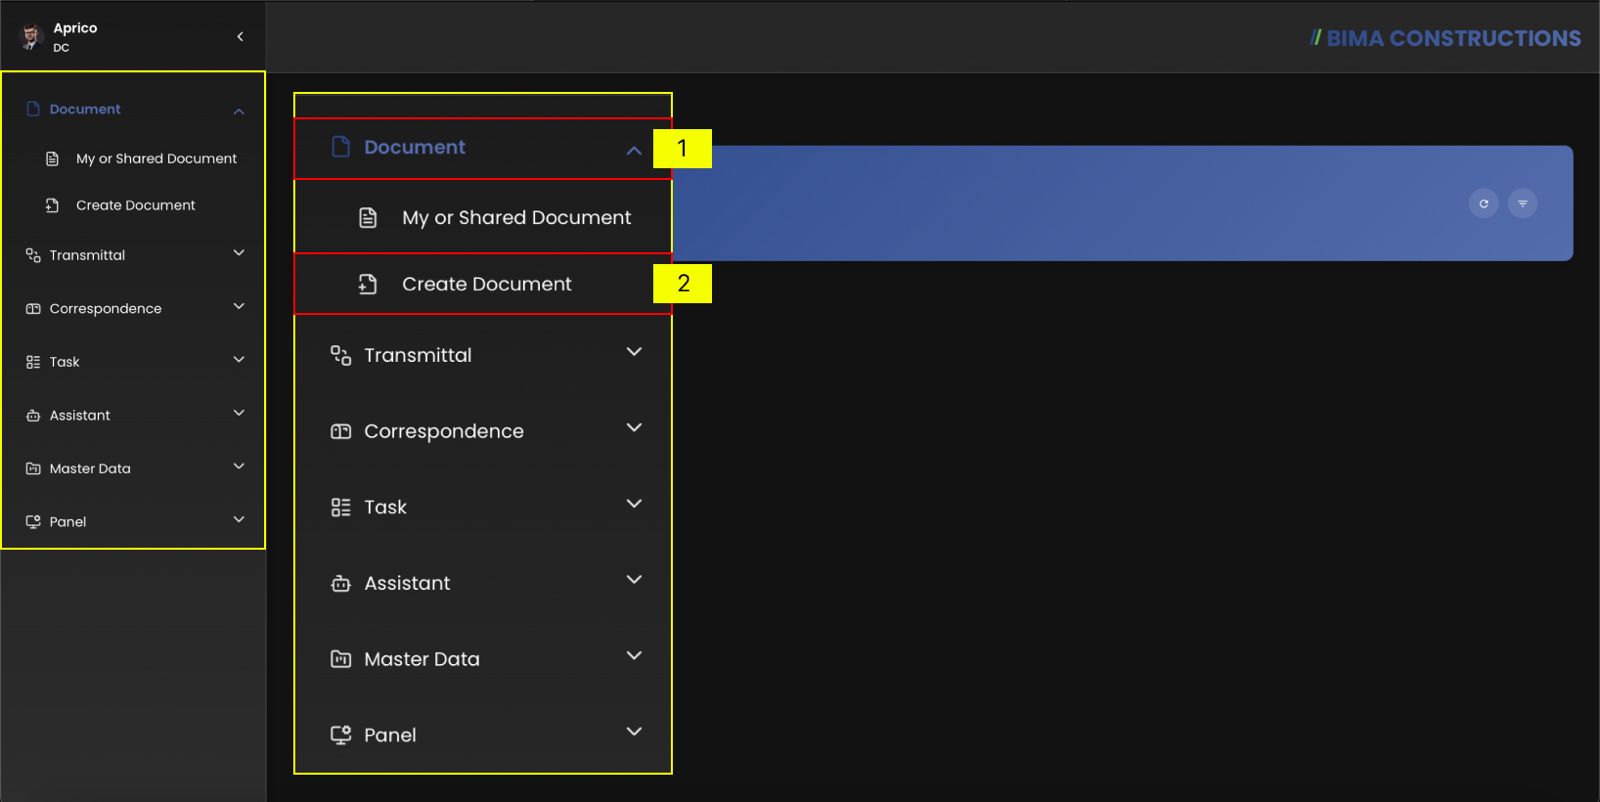 It can be seen in the side menu, in the
 Documents menu there is a menu titled Create Document, users can click on this menu so that the application can direct them to the Create Document page.
- Document Controller can click on the
Documentmenu button to open its sub menu. - Document Controller can then click on the
Create Documentmenu to go toCreate Documentpage.
2. Fill The Input Field
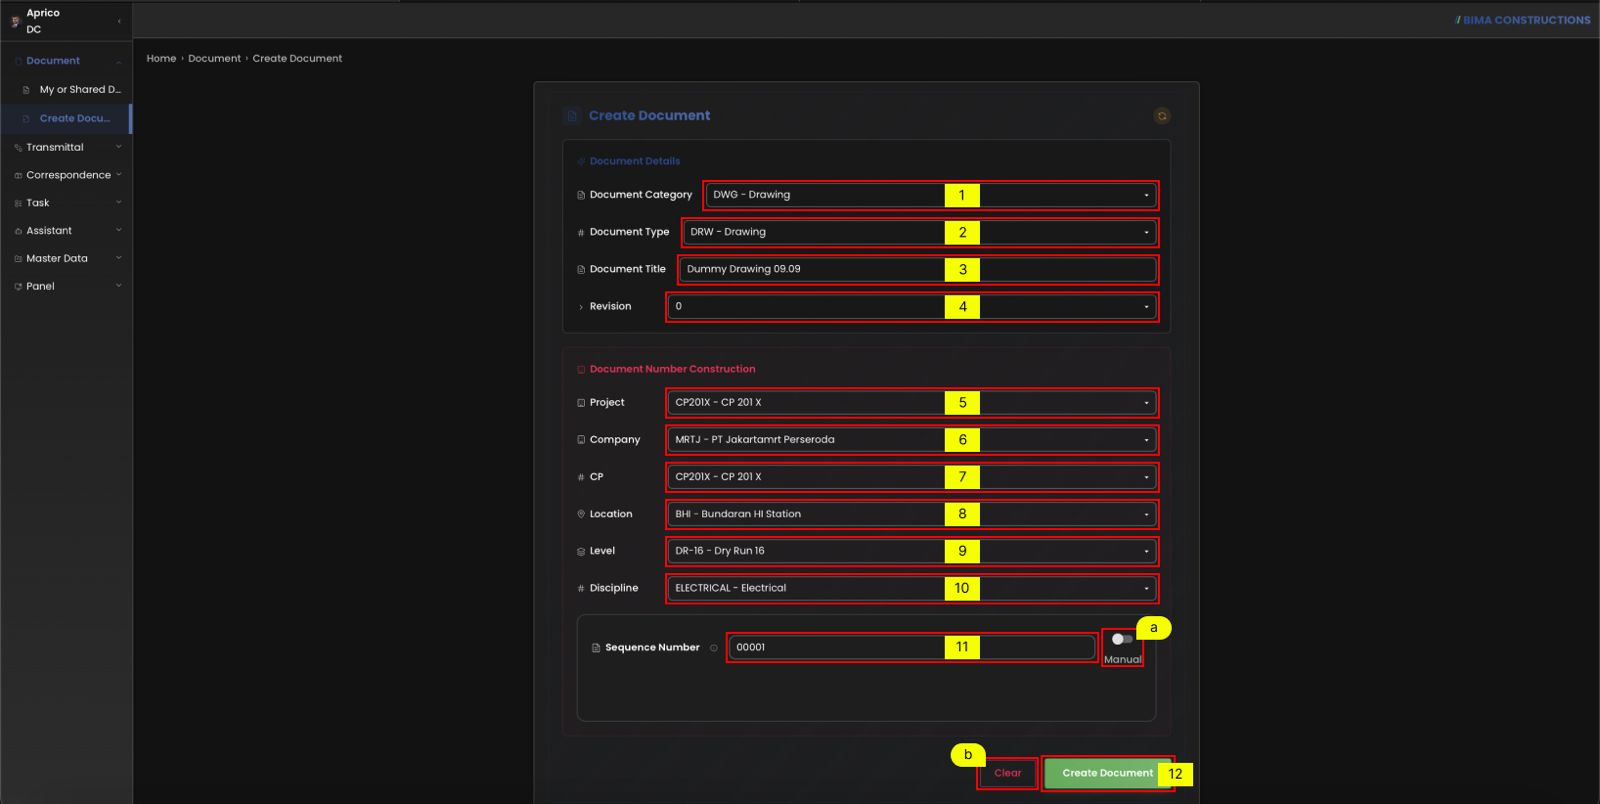 Once Document Controlller are on the
 Create Document page, Document Controller needs to fill in all the data required for the documents, that consist of:
- Document Category : Category of the document to be entered by the USER can be Document/Drawing/Correspondence.
- Document Type : The file type that depends on the category of the document to be entered based on the first field.
Drawing:
- Model Rendition
- Combined Model
- Specific for Clash Process
- Animation Model
- Drawing
- 2D Model File
Document:
- 3D Model FIle
- Combine Drawing Document
- Contract Documentation
- Individaual Clash Report
- Combined Clash Reports
- Calculation Report
- Authority Approval & Permits
- Announcement
Correspondence:
- Document Title : Title of the document to be created.
- Revision : Number version of the document (is it an update or a freshly created one).
- Project : The Project origin.
- Company : The Company origin of the document.
- CP : The Contract Package relate to the document.
- Location : Location where the project will be build.
- Level : From which floor the project on the document is executed.
- Discipline : (PIC) Persosn in Charge of the document project.
- Squence Number : Unique running number that can be set manually by the USER, or automatically generated by the system if not specified.
- If the Document Controller has confirmed the data is entered correctly, the Document Controller can click
Create Documentto save the new document.
Extra
- [a] If the USER wants the Sequence Number to be generated automatically, USER can switch the toggle to Auto.
- [b] If the USER wants to clear all the input fields, USER can click the
Clearbutton.
3. Check The New Created Document
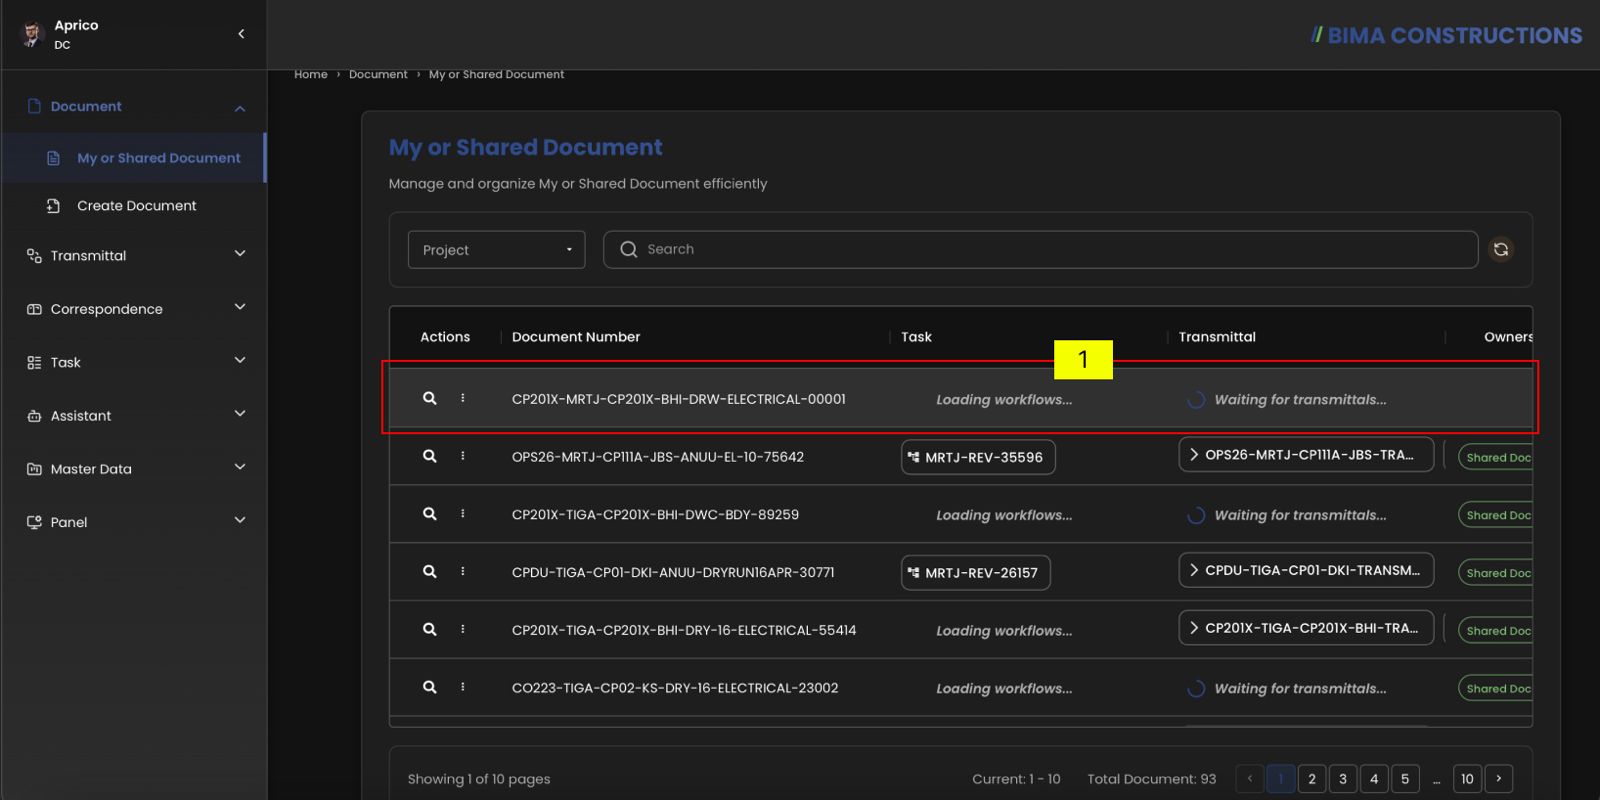 When the USER has clicked the
 CREATE button, the BIMA Construction application will display the My Document page, which constains a list of documents that the USER has successfully created.
Look at the Detail
Document Controller can also view details of all documents that have been successfully created. To start on checking the details of each documents, Document Controller can follow these steps.
1. Choose Document
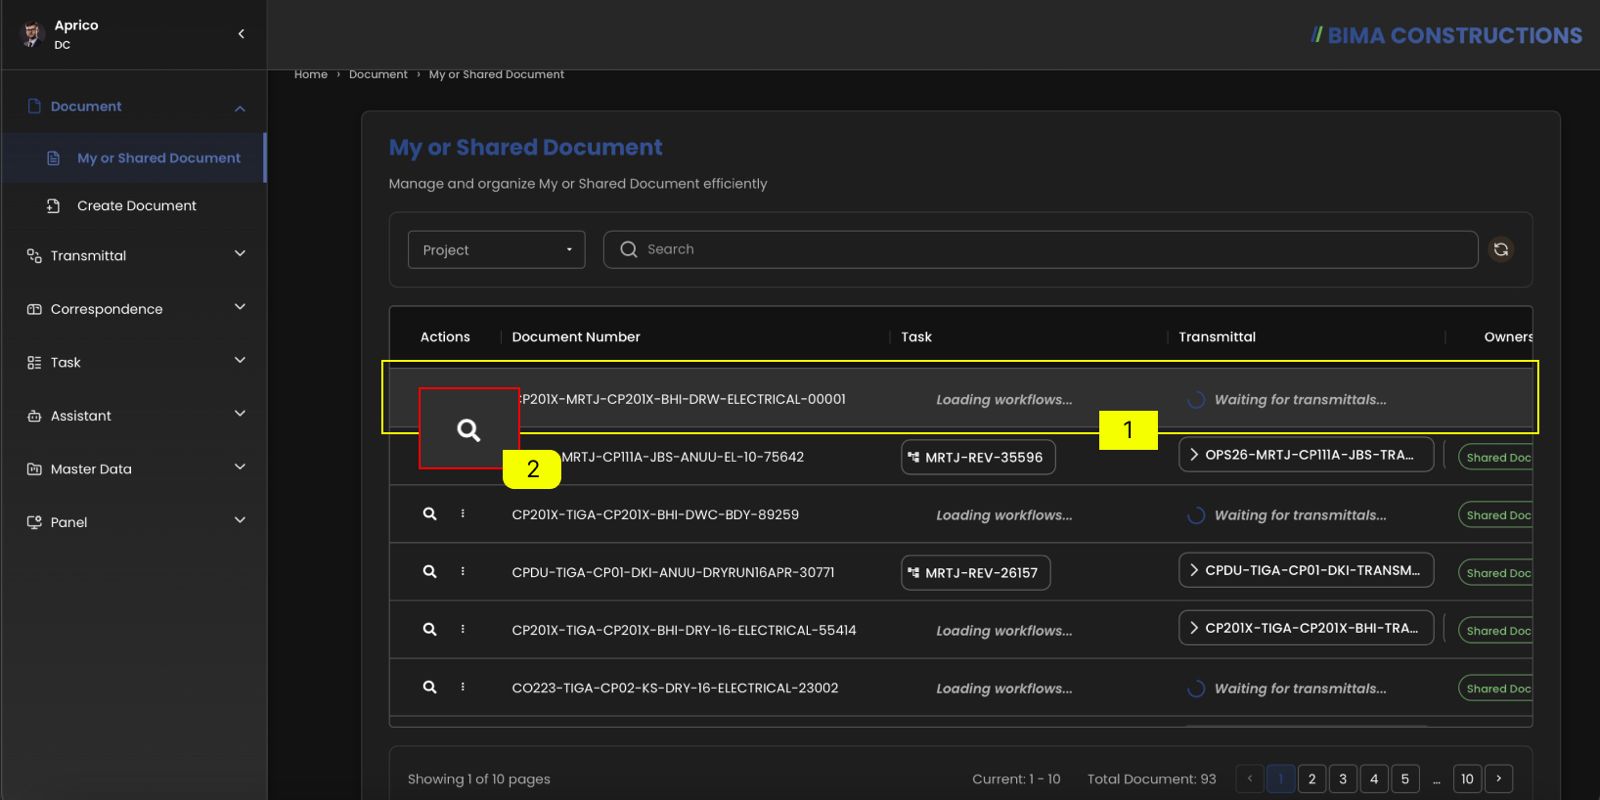 If USER wants to look at the detail of the newly created document or any available document, USER can first go to the
 My or Shared Document page by clicking it from the side menu.
- After the USER is on the My or Shared Document page, USER can choose the document that they want to view in detail.
- USER can click on the Search (magnifying glass) icon located under the Actions column to access the detailed information about the document.
2. Check The Detail
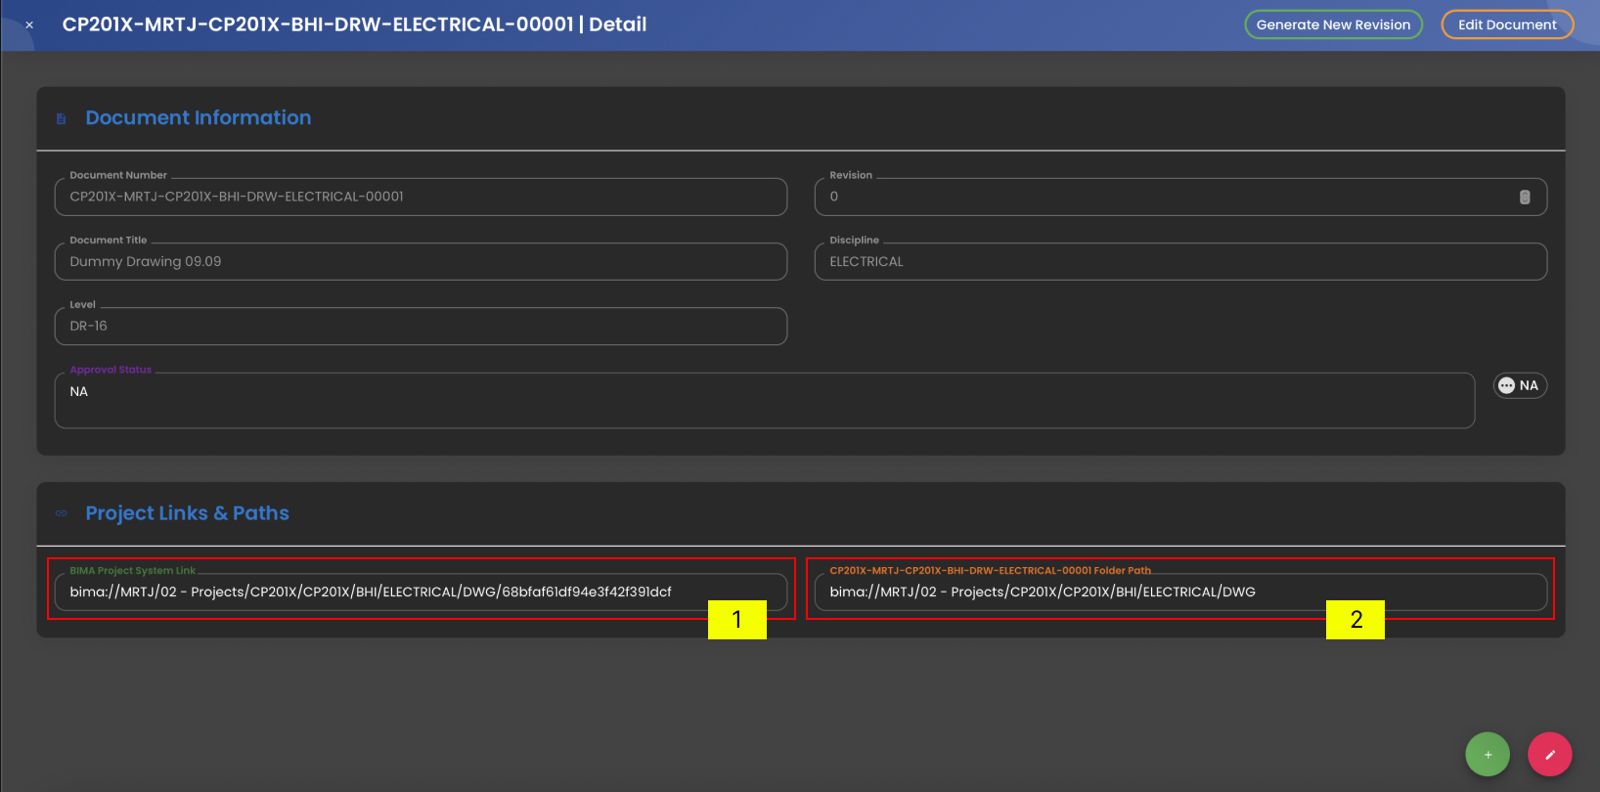 After clicking the
 Detail button, the USER will be directed to a page containing detailed information of the document that has been successfully created.
- On the first red bordered field, USER can see the BIMA Project System Link that is automatically generated by the system. This link can be used to access or input files/models inside the document by using the BIMA Projects Application.
- On the second red bordered field, USER can see the Folder Path of the document location inside the system, which indicates the storage path of the related files.
Update Document
After clicking the Details button, the USER is then directed to a pop-up page containing details of document the USER has successfully created previously.
On the red colored border USER can see the link that produced automatically by BIMA, this link are the link that USER can use to access/input files/models inside the document by using the BIMA Projects Application.