Tool
Add New Tool
1. Go To Tool Page
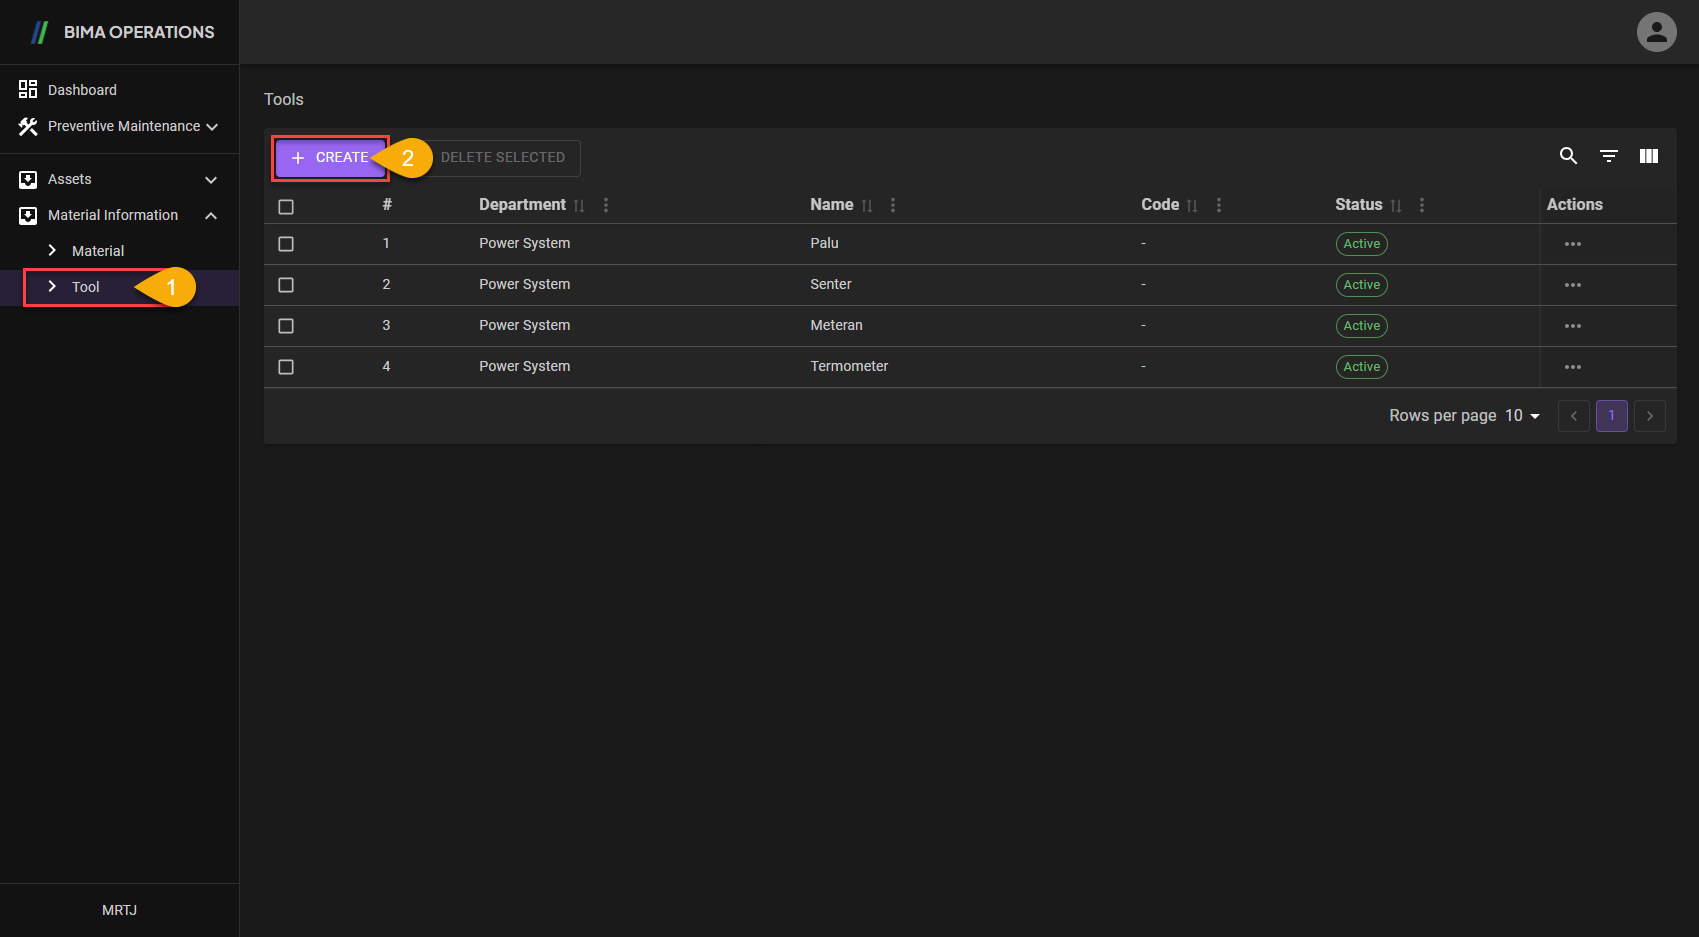
- Planner can click on the
Toolmenu button to go to theToolpage. - Planner can click on the
+ CREATEbutton to display theCreatepanel.
2. Add/Create Tool
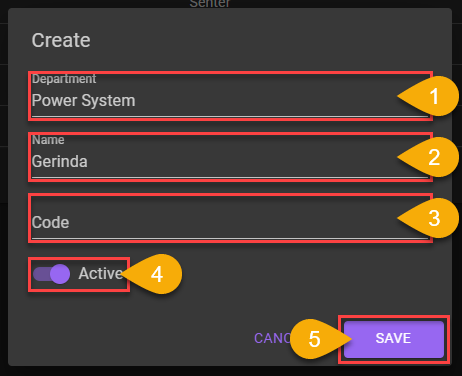
- choose any departement available on the dropdown list. The departement choosen are a department of which the item will be located at.
- Planner input a name of the
Toolthat are gonna be put on the department. - Planner input a code which represent the
Tool. - Don't forget to turn the switch on, so the new
Toolwill be Active when Super Admin/Planner/Section Head want to use it for creating newWork Order. - After checking all the data inputed, Planner can click on the
SAVEbutton to save the newToolthat was added.
3. Add/Create Tool Finish
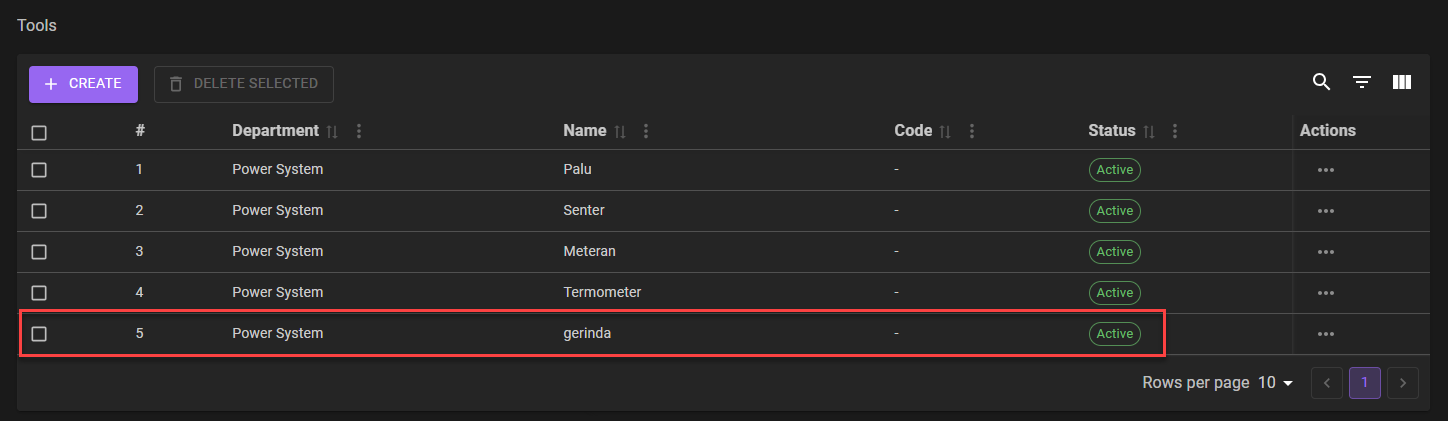 The
The Add/Create Tool
process finish.
- After adding a new tool, the finish process are marked by the presence of the new tool and
Activestatuss on the list. - After adding an existing tool, the finish process are marked by the
Activestatus on theStatuscolumn.
Edit Tool
1. Choose Tool That Need to Edit
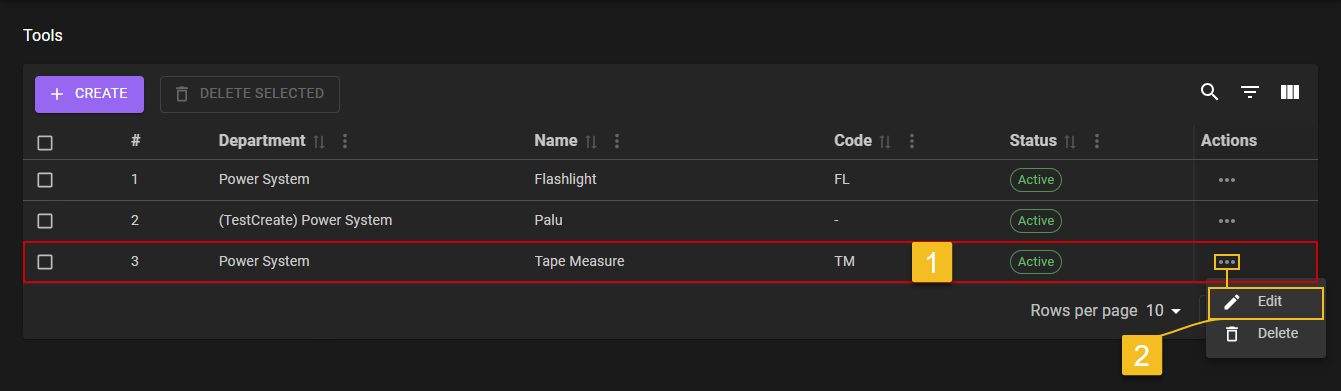
- Planner choose on what
Toolsneeds to be edited. - After clicking on the
Three-Dotaction menu Planner then can click on theEditaction menu.
2. Choose What Field Need to Edit
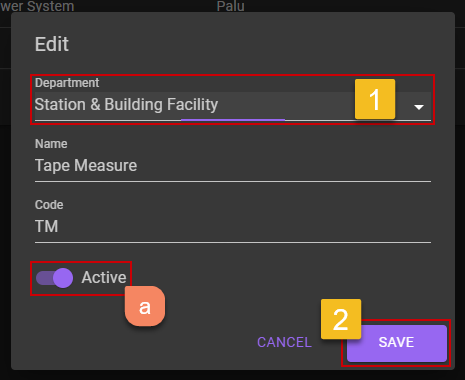
- Planner edit the
Tools. - If Planner already make sure that the data inputed correctly,
Planner can click on the
Savebutton
Extra:
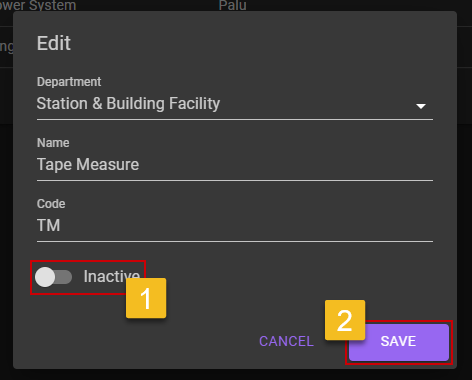
a. Deactivate Tools
- Planner can flick the
Statusswitch to off, if Planner want to deactivate theTools.- Planner then can click on the
SAVEbutton to saving theToolson anInactivestatus.b. Tools Deactivated
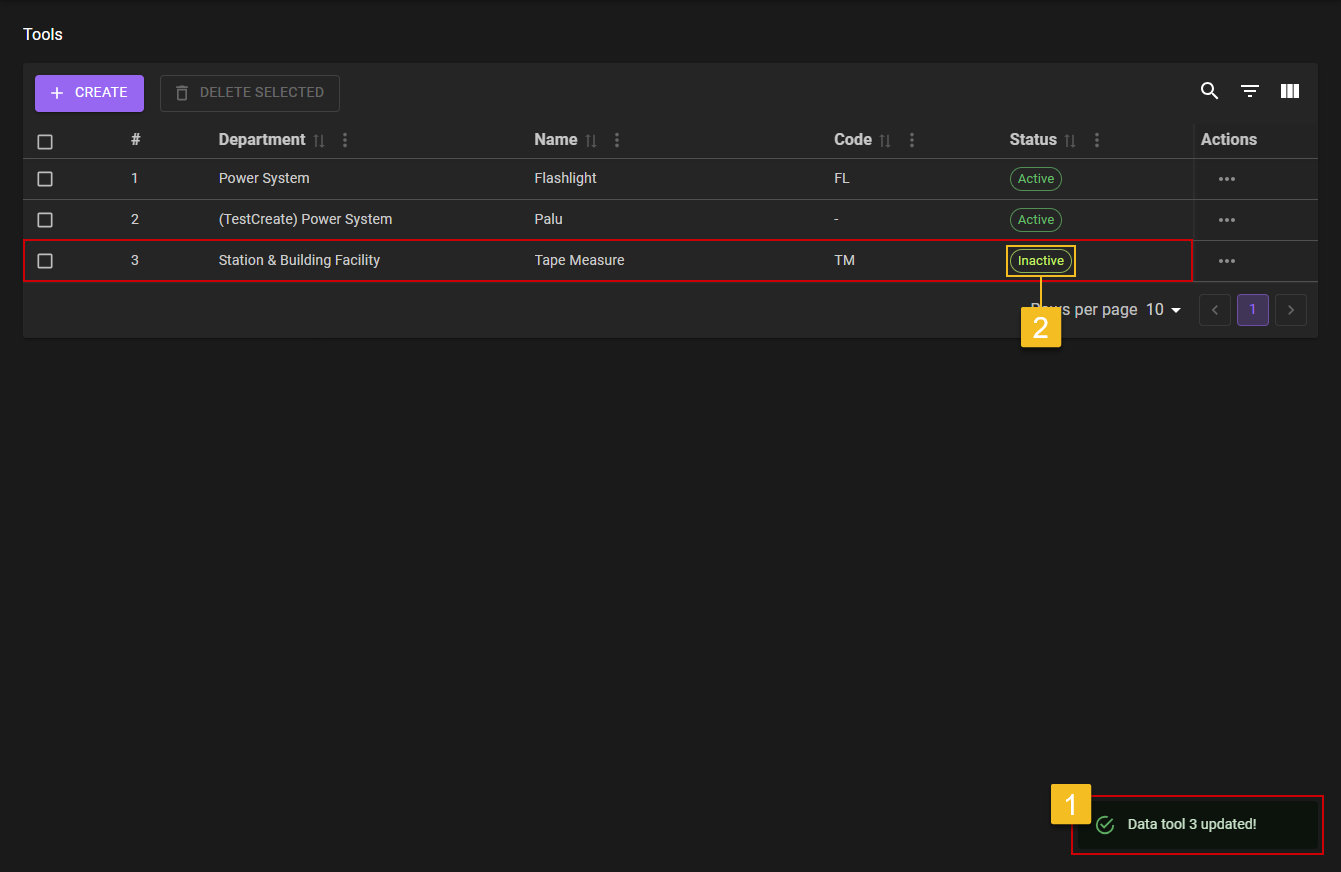
- After Planner deactivate the
Tools, a notification will come out which isData tools [number] updated!, it means theEditprocess are sucessfuly save.- To make sure even more, Planner can check on the
Statuscolumn of the whichToolsto see if it is on anInactivecondition.
3. Confirm Edit
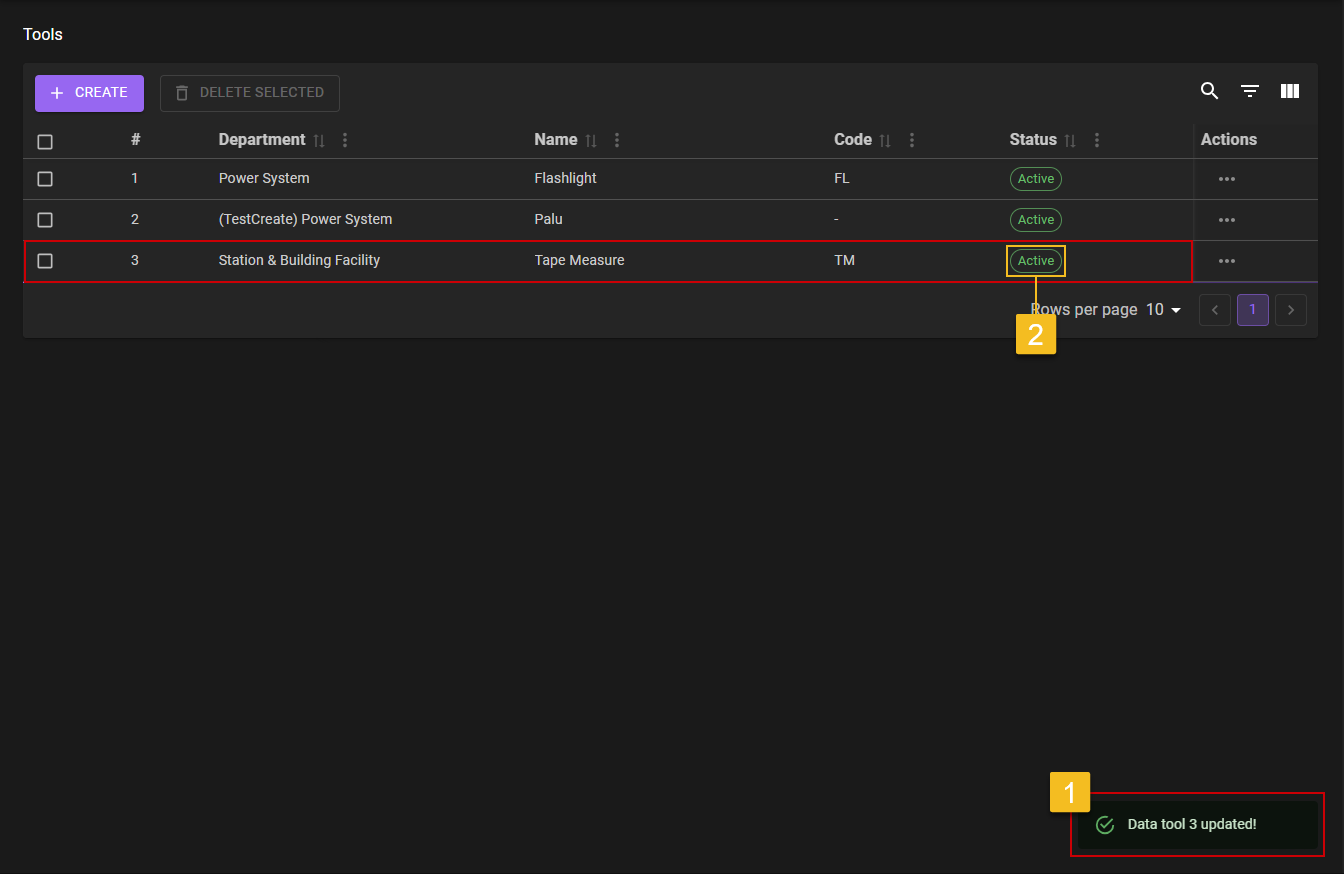
- After Planner click the
SAVEbutton, a notification will came out which isData tool [number] updated!. - To make sure even more, Planner can check on the list of the
Toolsif the editedUnitdata are updated on the list.
Delete Tool
1. Choose Tool That Need to be Delete
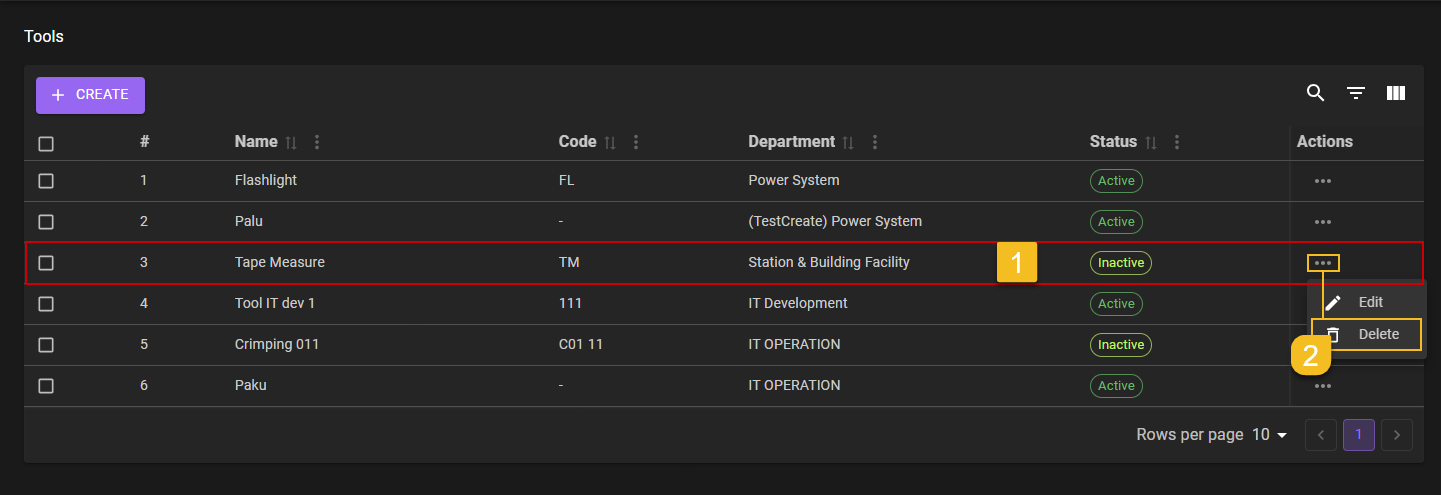
- Planner choose on what
Toolsneeds to be deleted. - After clicking on the
Three-Dotaction button Planner then can click on theEditaction menu.
2. Delete Tool
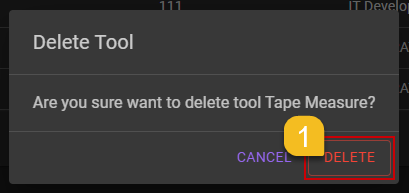
- After clicking on the
Deletebutton, confirmation popup will be shown. Planner can chooseDELETEbutton to confirming it.
3. Confirm the Deletion of Tool
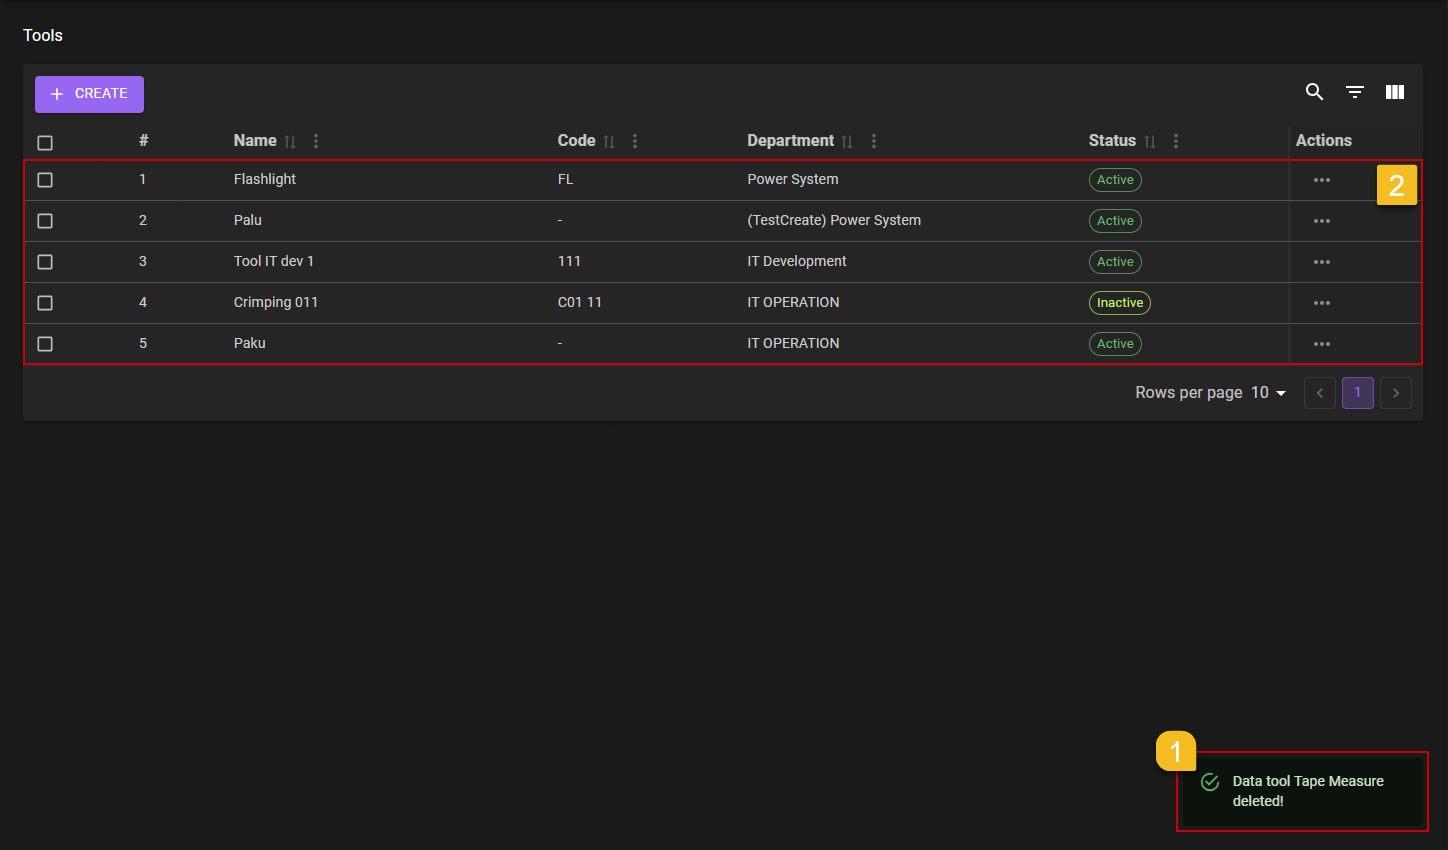
- Planner will got a notification
Data Tools [Name] deleted!. - Planner can check on the list, if the deleted part still on the list or not.