Period
Create
1. Go To Period Page
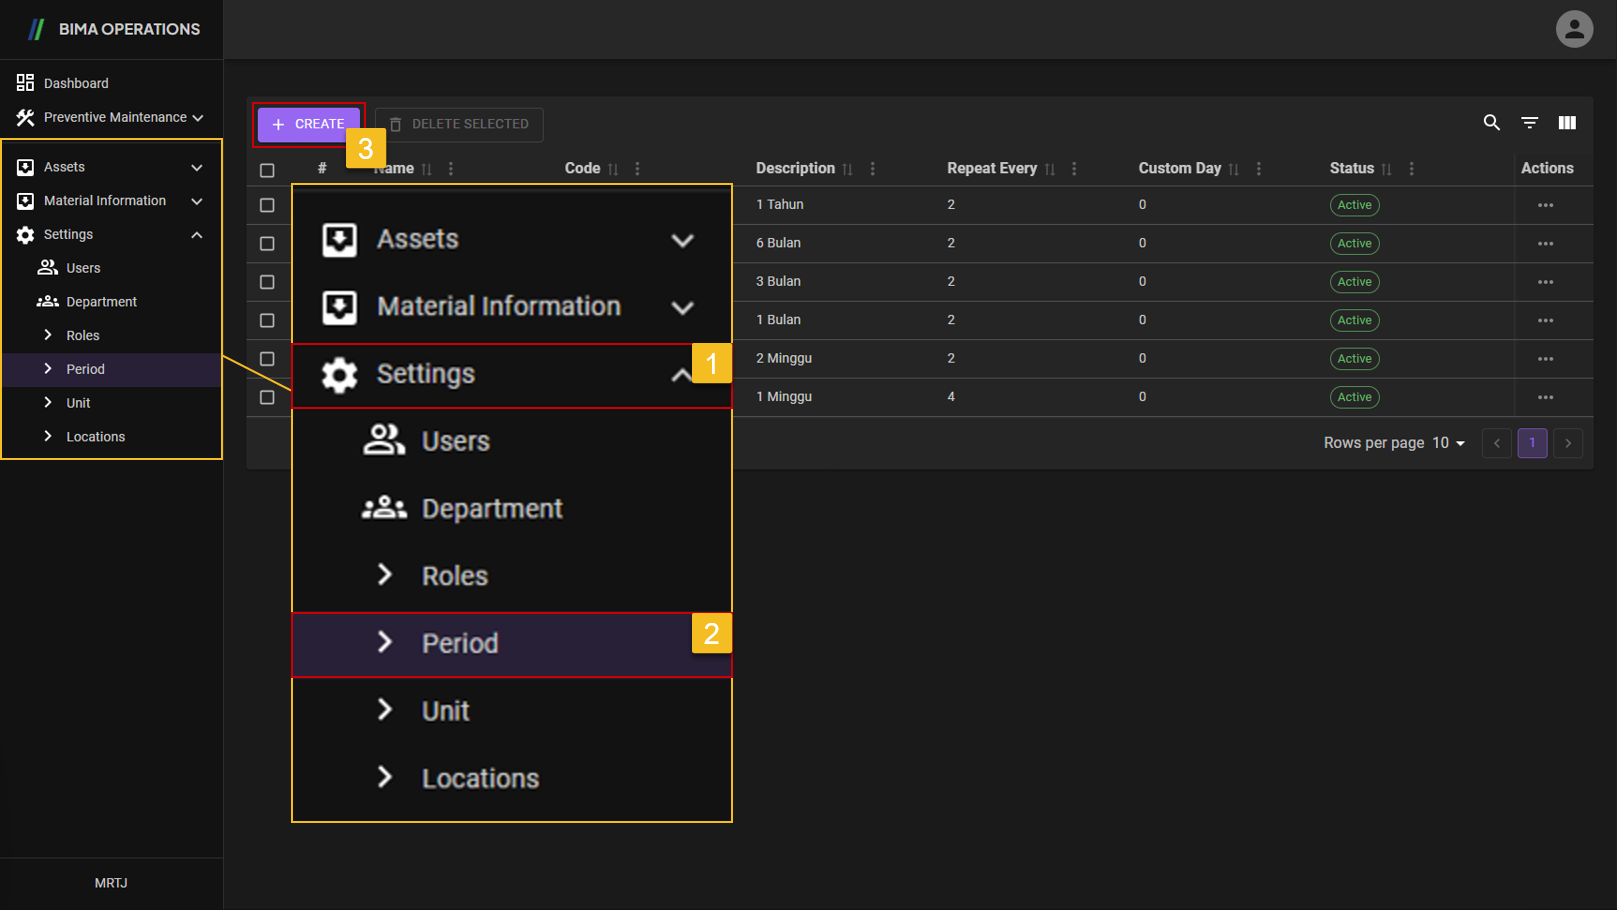
- Before accessing the
Periodpage, Super Admin can find the menu button inside theSettingsmenu. - After finding the
Periodmenu button Super Admin can click on thePeriodmenu button to go to thePeriodpage. - Super Admin can then click on the
+ CREATEbutton to add/create newPeriod.
2. Create New Period
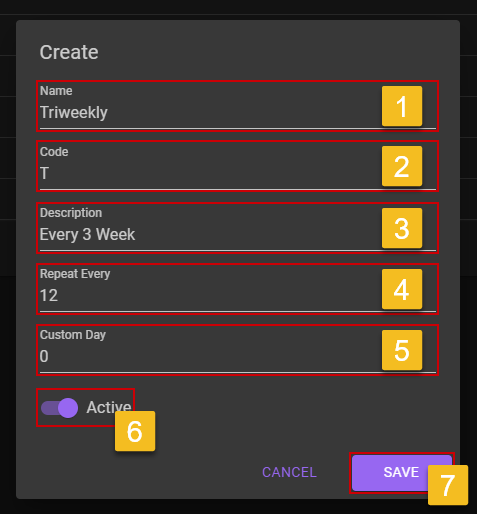
- Super Admin can fill in the
Namefield with the appropriate name for the required period. - Super Admin can fill in the
Codefield with code that represents the period name. - Super Admin can give a short description about the period for better understanding of the period represent.
Repeat Everymeans how much Super Admin wants the period to repeat for.- don't forget to turn the
Statusswitch to on, so the newPeriodwill beActiveand the Other USER can use it immediately if needed. - If Super Admin already sure about the data inputed, then Super Admin can click on the
SAVEbutton.
3. Check New Created Period
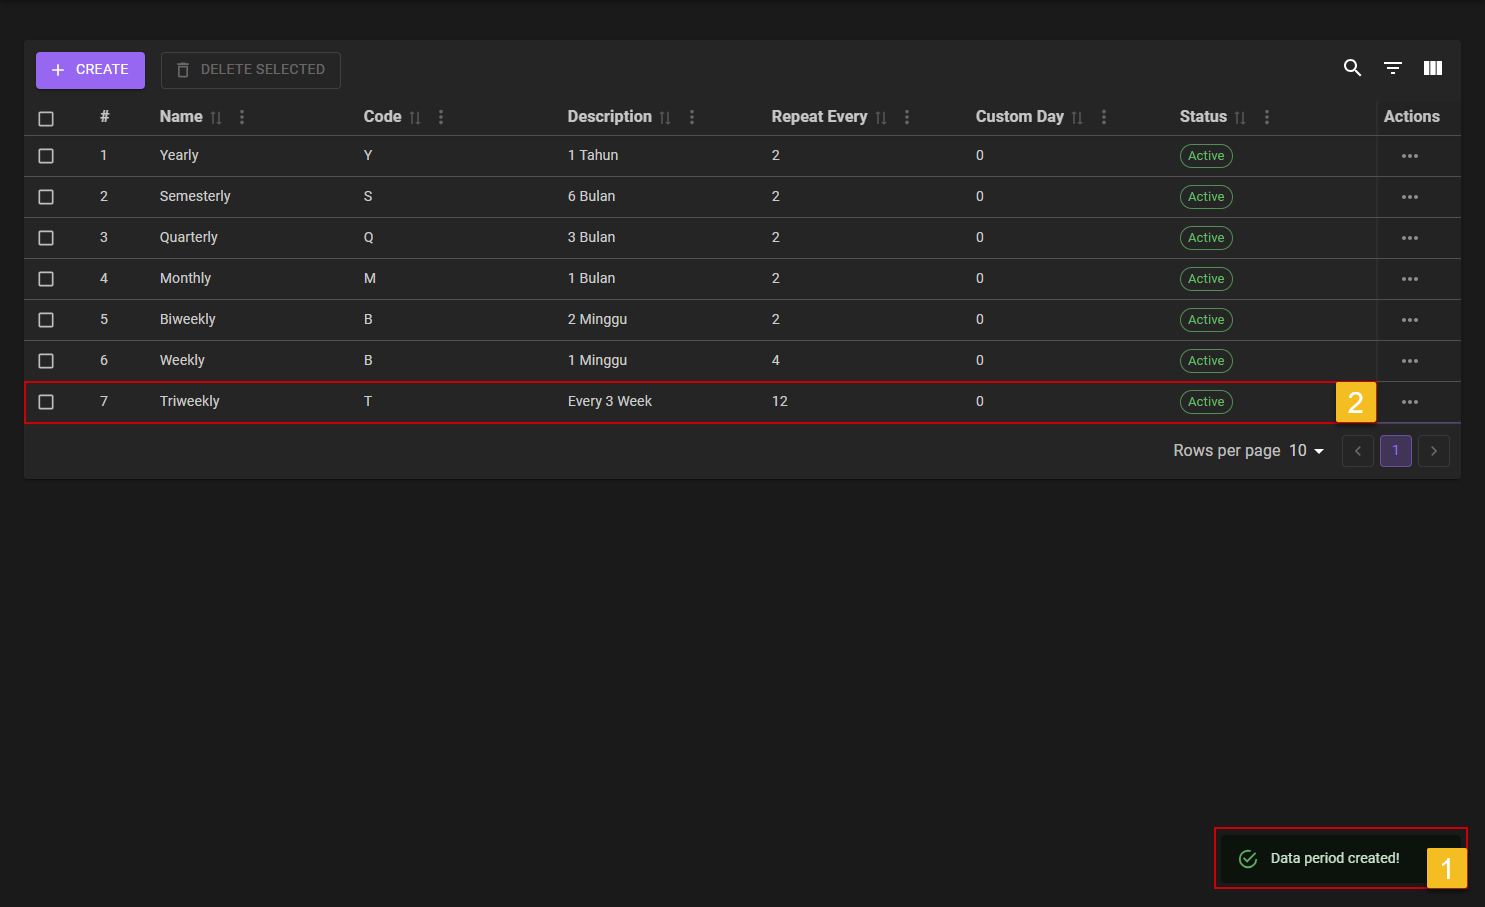
- After saving the new
Period, Super Admin will got a notification that saysData period created!. - Make sure the new
Periodare created successfully by looking on the list to see if the newperiodare on the list or not.
Edit Existing Period
1. Choose Period That Need to be Edit
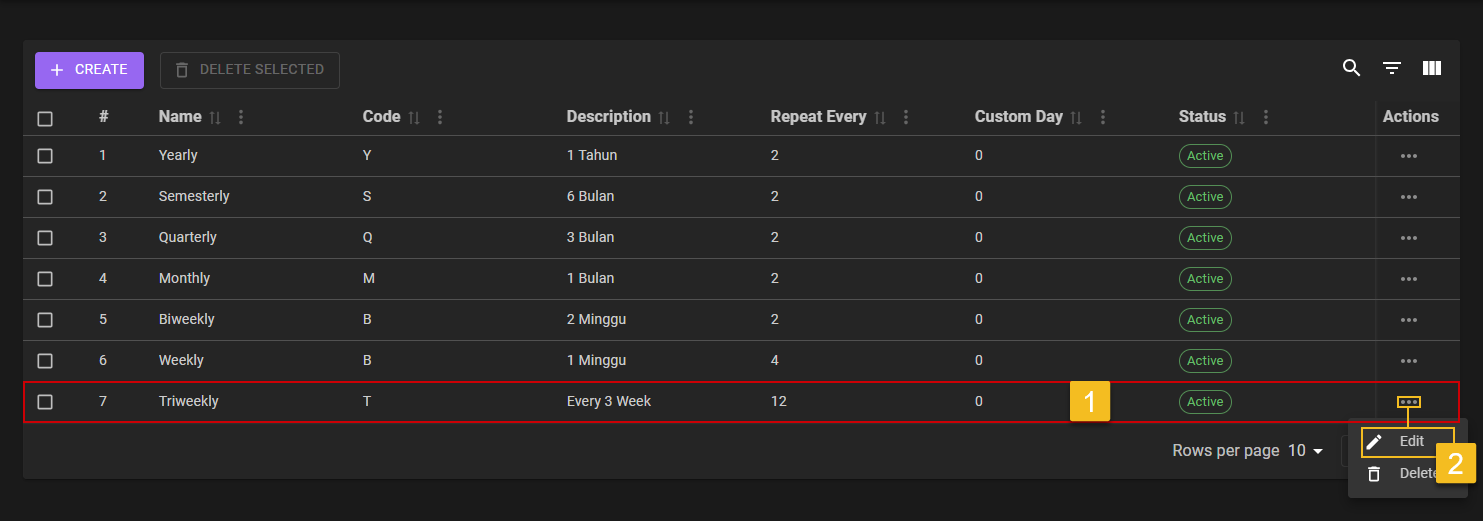
- Super Admin choose on which
Periodneeded to be edit. - Click on the
Three-Dotaction button, to reveal theEditaction menu and click it to start the editing process.
2. Choose What Field Need to be Edit
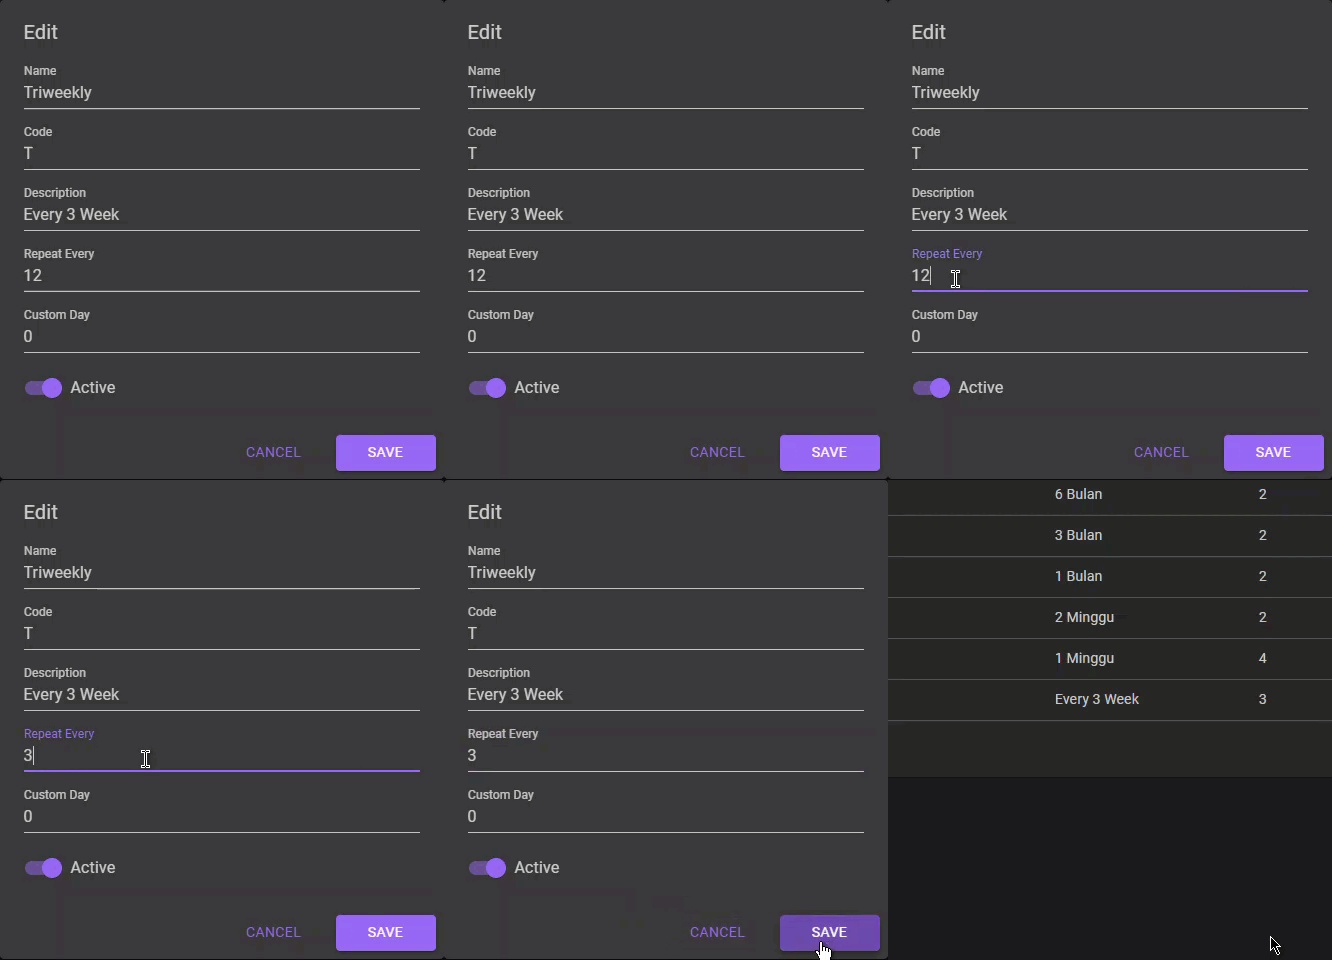
- Super Admin can choose on which field are neede to edit.
- If Super Admin already sure about the date change, then Super Admin can click on the
SAVEbutton.
a. Deactivate Period
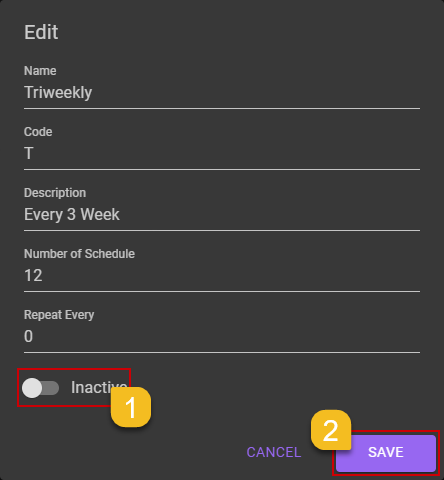
- Super Admin can flick the
Statusswitch to off, if Super Admin want to deactivate thePeriods.- Super Admin then can click on the
SAVEbutton to save thePeriodon anInactivestate.b. Period Deactivated
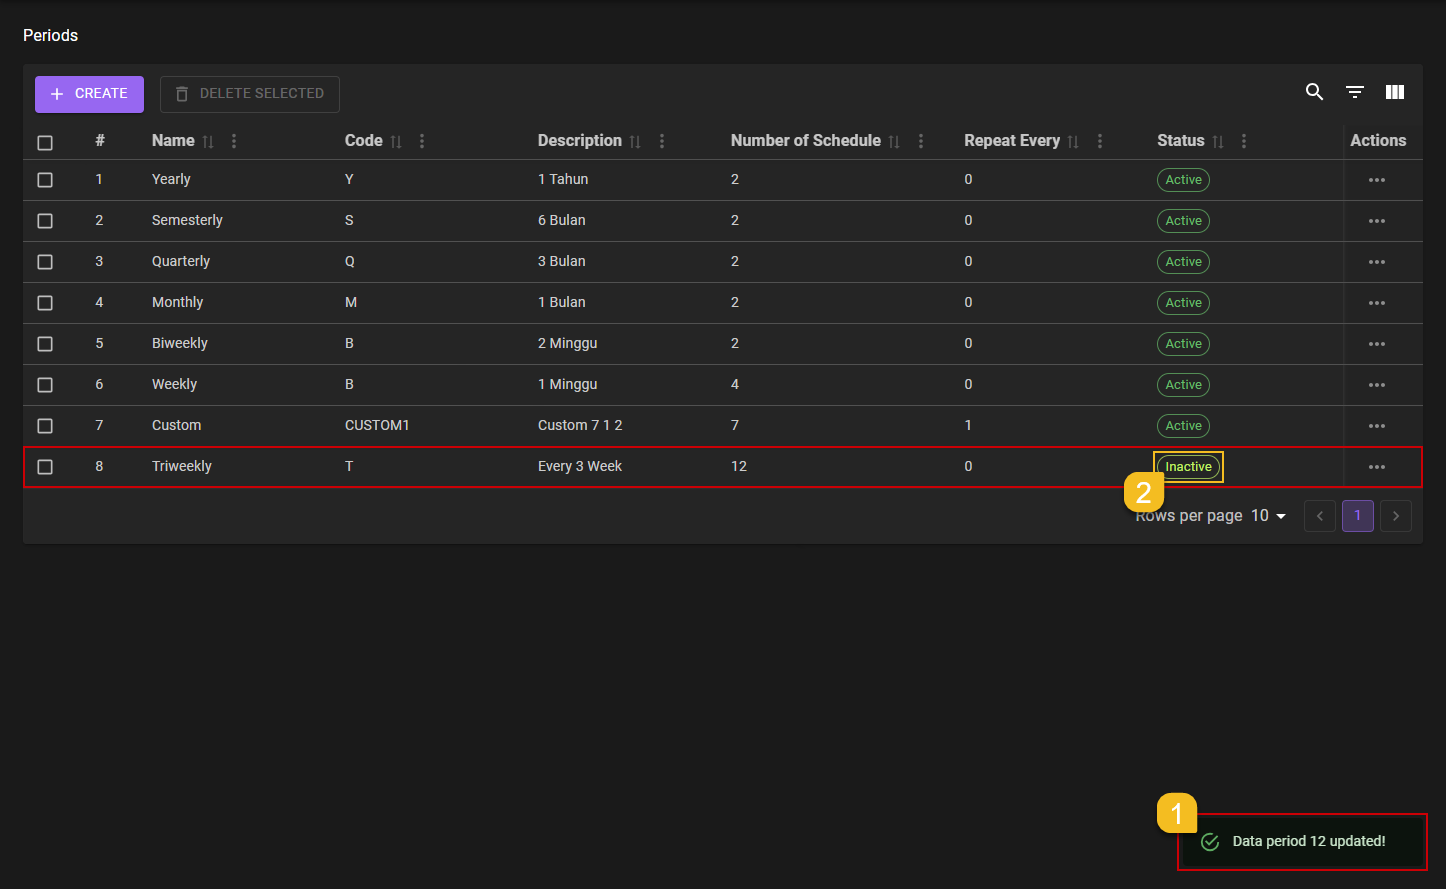
- After Super Admin deactivate the
Period, a notification will come out sayingData period [number] updated!.- Make sure the edited
Periodare successfully updated by looking on the list it self.
3. Confirm Edit
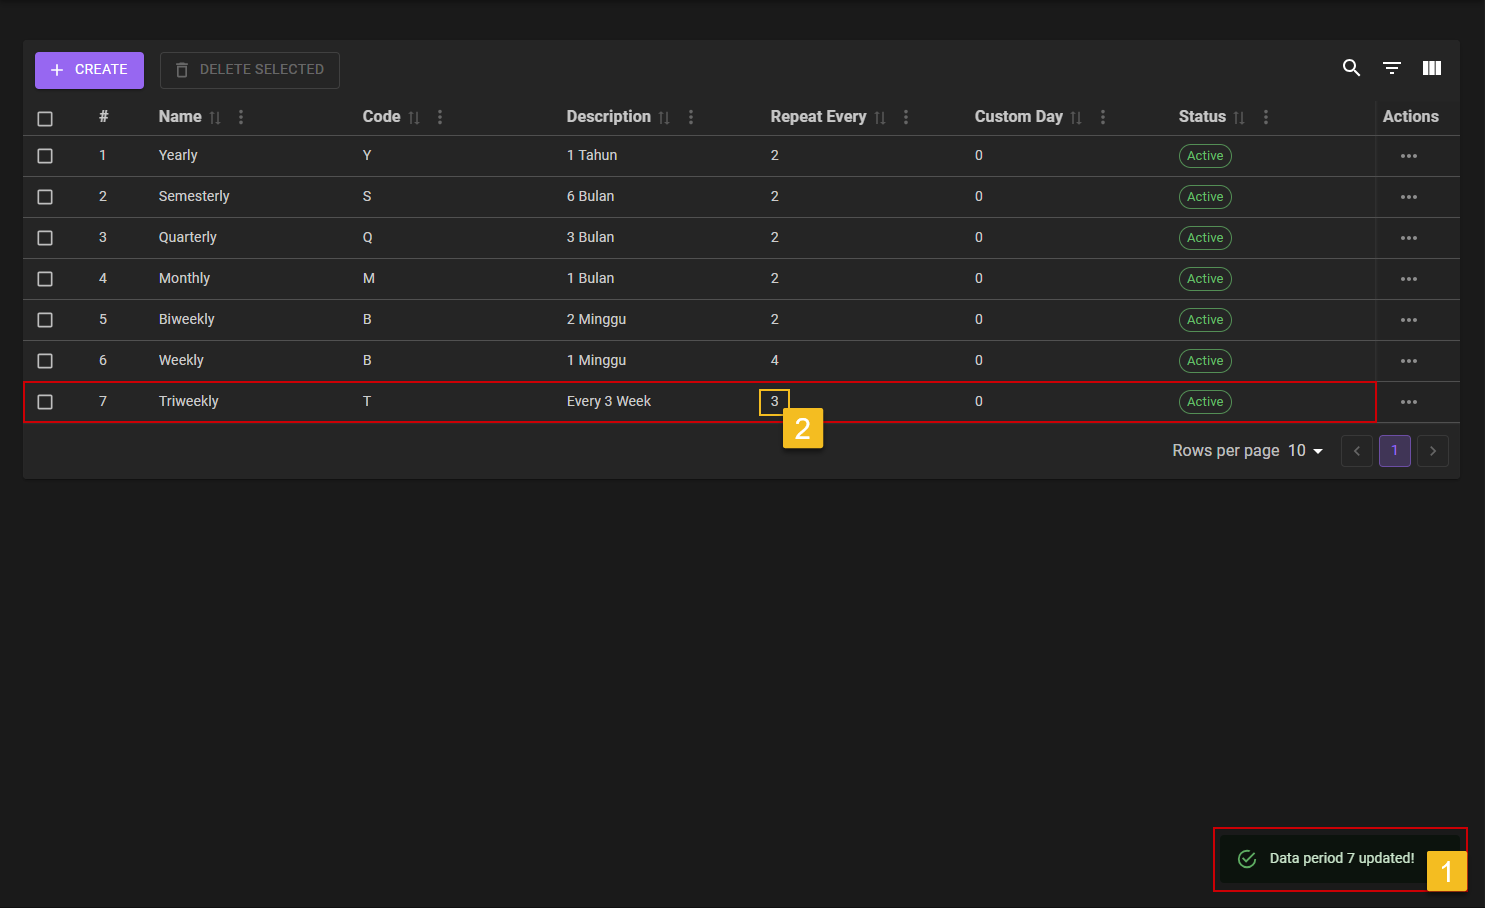
- After Super Admin click the
SAVEbutton, a notification will came out sayingData period [number] updated!. - Make sure the edited
Periodare updated accordingly into the list by looking into the list it self.
Delete
1. Choose Period That Need to Delete
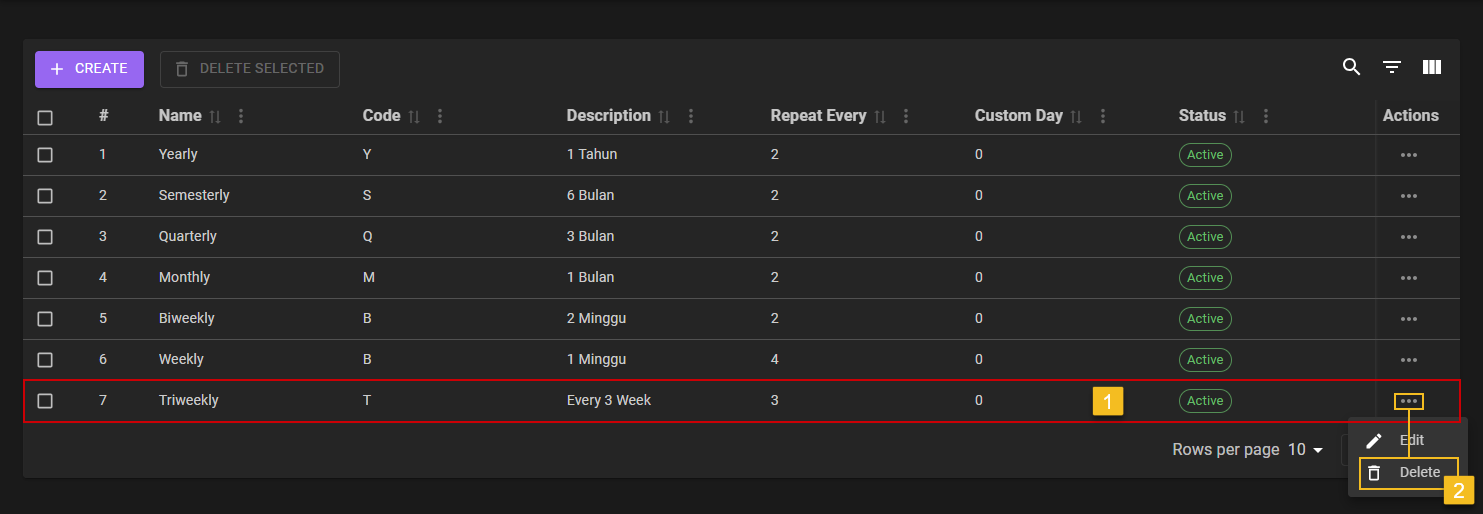
- Super Admin choose on which
Periodneeds to be deleted. - Click on the
Three-Dotaction button, to reveal theDeleteaction menu and click it to start the deletion process.
2. Delete The Period
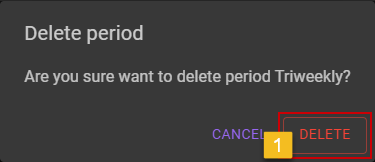
- After clicking on the
Deleteaction menu, a confirmation will be shown. Super Admin can choseDELETEbutton to confirming it.
3. Confirm the Deleteion of Period
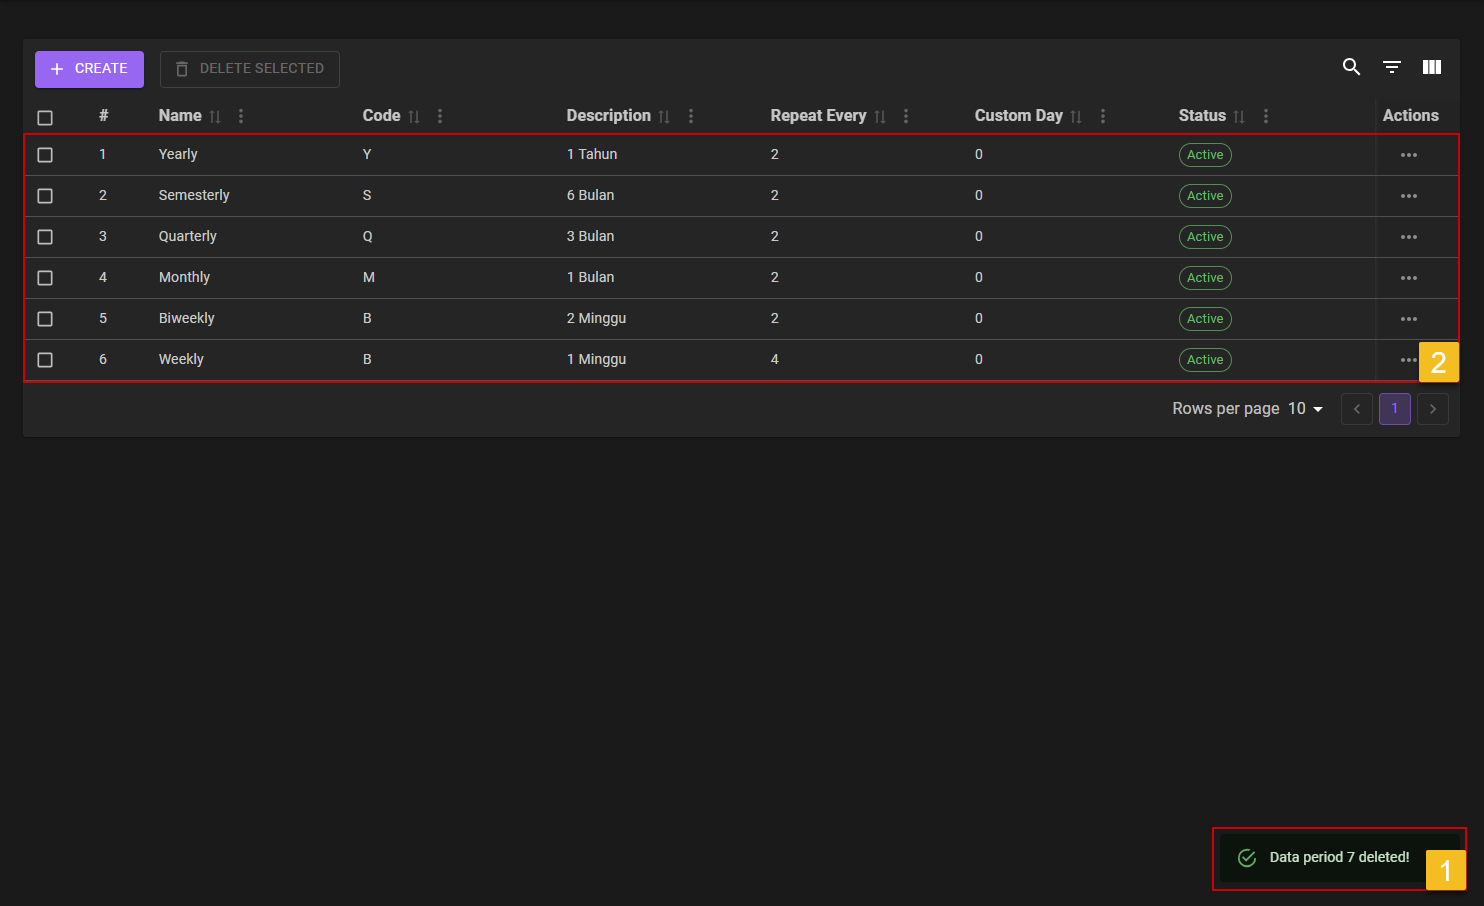
- Super Admin will got a notification saying
Data peiod [number] deleted!. - Super Admin casn check on the list if the deleted
Periodare still on the list or not by checking on hte list it self.