Subsystem
Intro
Before begining the create new subsystem process, Super Admin need to know that there are 2 methods of inserting a new subsystem:
- First, inserting them manually by clicking on the
+ CREATEbutton. - Second, insert it using the Import Excel function by clicking the
IMPORT EXCELbutton.
To do the manual process Super Admin can see this instruction below.
If by any chance Super Admin want to enter it by using the IMPORT EXCEL function, Super Admin needs to follow the instruction that are available using this link --> Import Pre-Made Data.
Add/Create New Sub System
1. Go To Subsystem Page
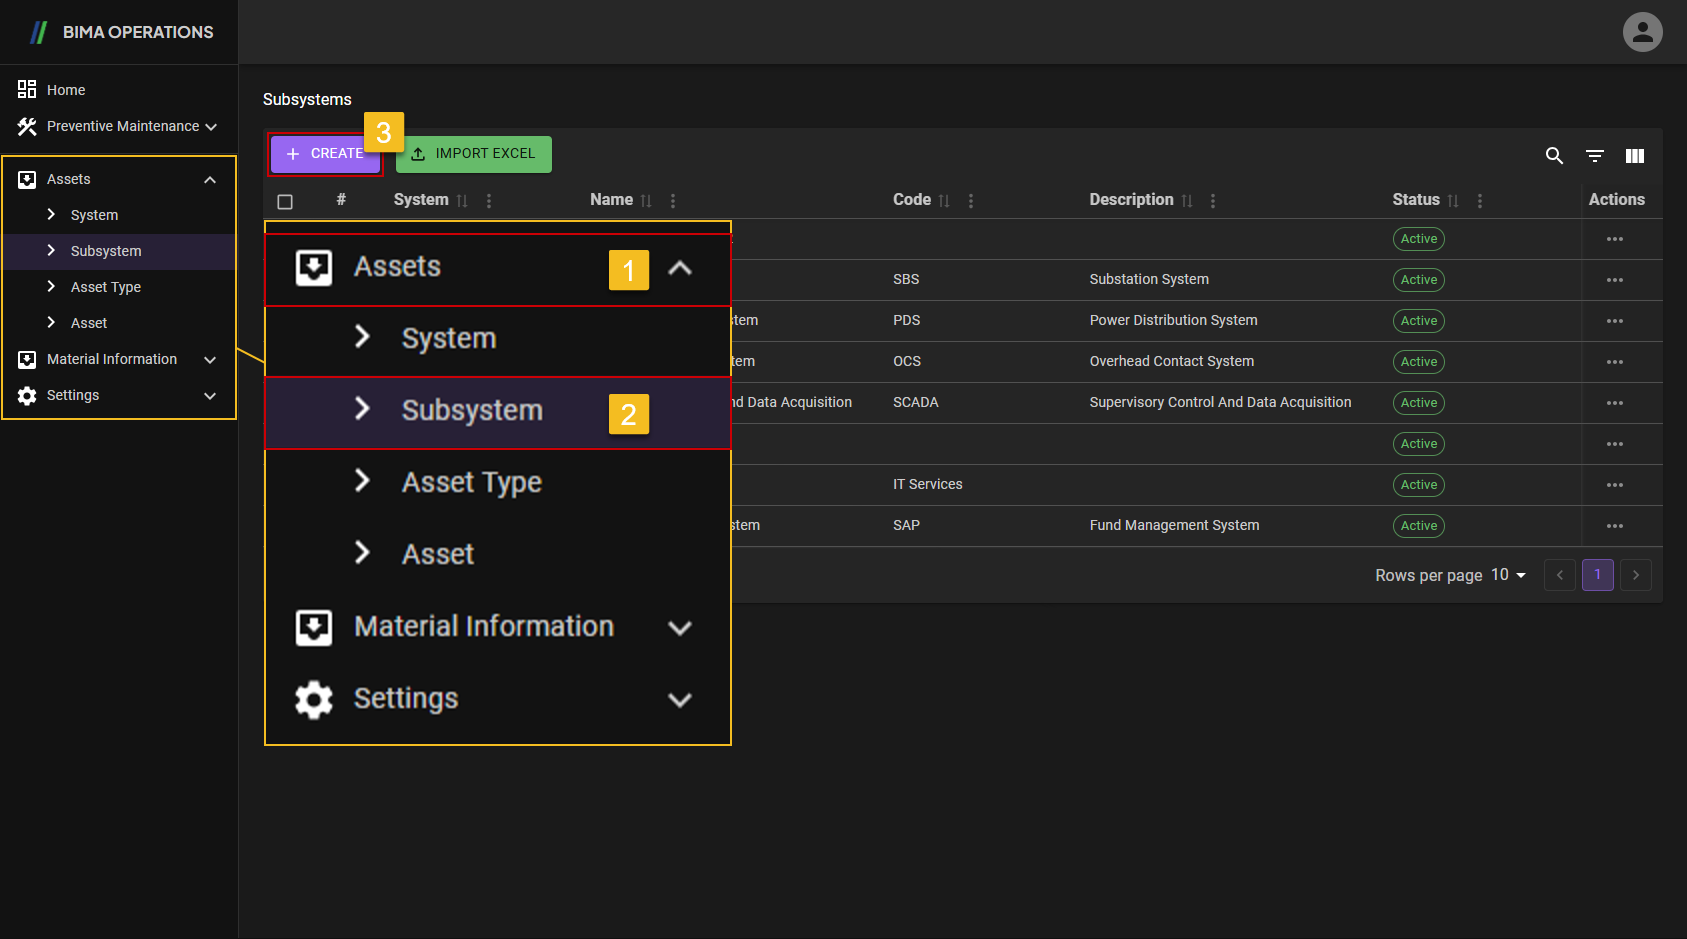
- Super Admin can go to the
Subsystempage by clicking theSubsystemmenu under theSystemmenu. - After being on the
Subsystempage, Super Admin can click theCREATEbutton to open theCreatepanel.
2. Create New Subsystem
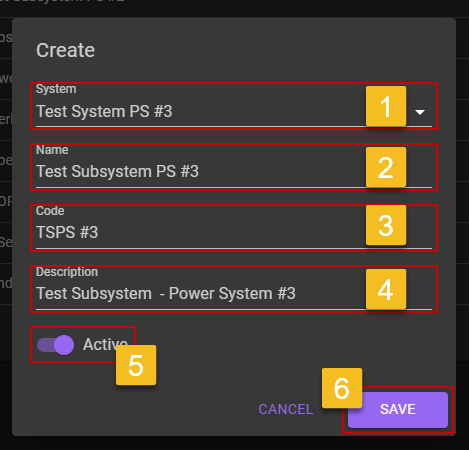
- Super Admin choose any system that available on the dropdown list. This system will be...
- Super Admin input a name for the new
Subsystem. - Super Admin input a code which represent the name of the new
Subsystem. - Super Admin can put a short description of the new
Subsystem. - Don't forget to turn the switch to on, so the new
Subsystemwill be Active when Super Admin or Planner want to create a newAssetlater on. - After checking all data inputed, Super Admin can click on the
SAVEbutton to show save the newSubsystemthat was created.
3. Create New Subsystem Finished
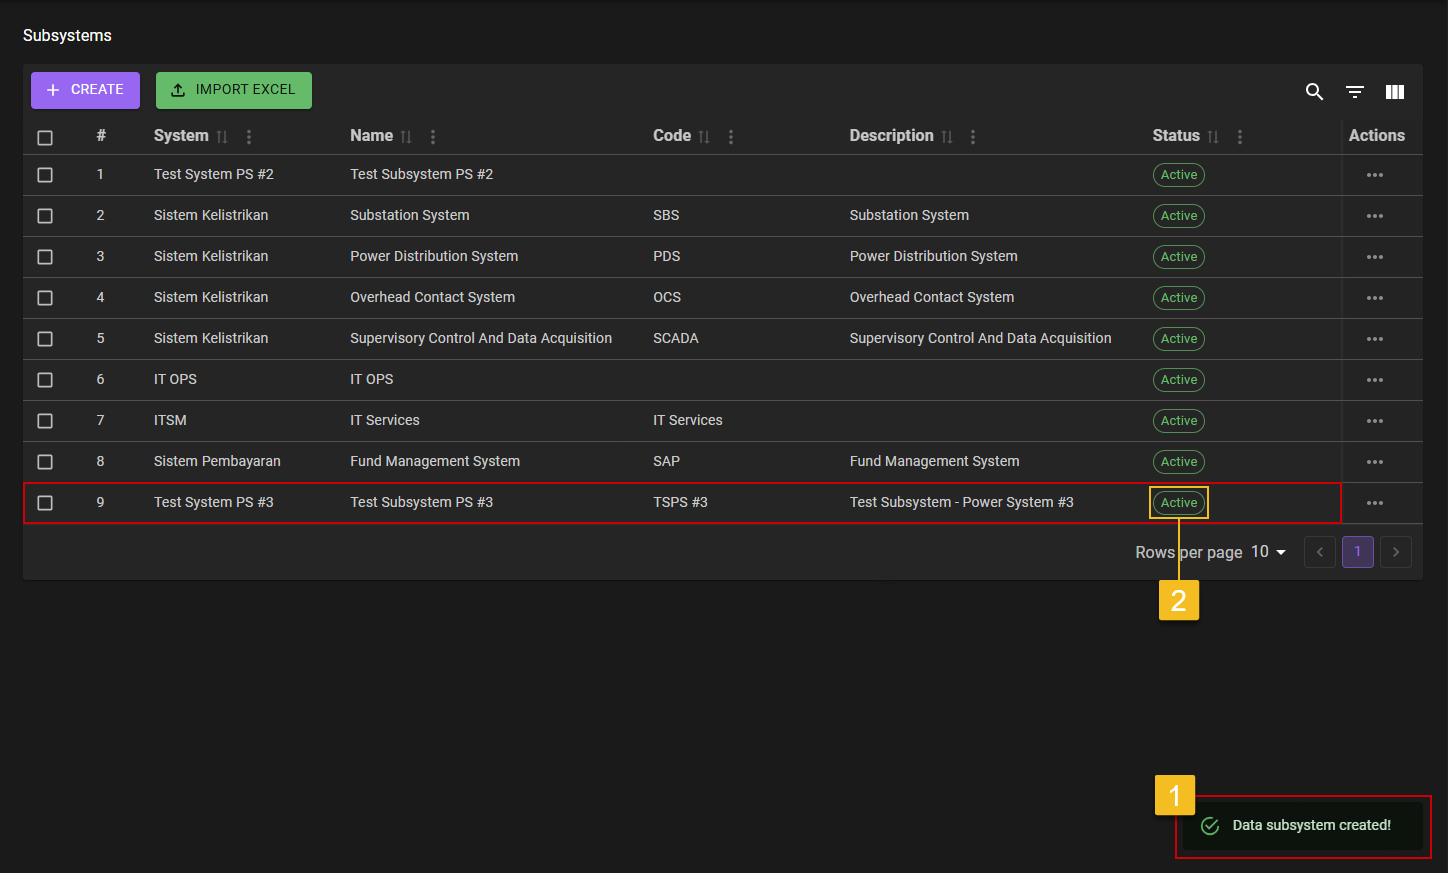
- The
Craete New Subsystemprocess finish, marked with the notification Super Admin got, which isData subsystem created!. - Super Admin also need to make sure the list are updated with the itme Super Admin had created.
Edit Existing Sub System
1. Choose Sub System That Need to Edit
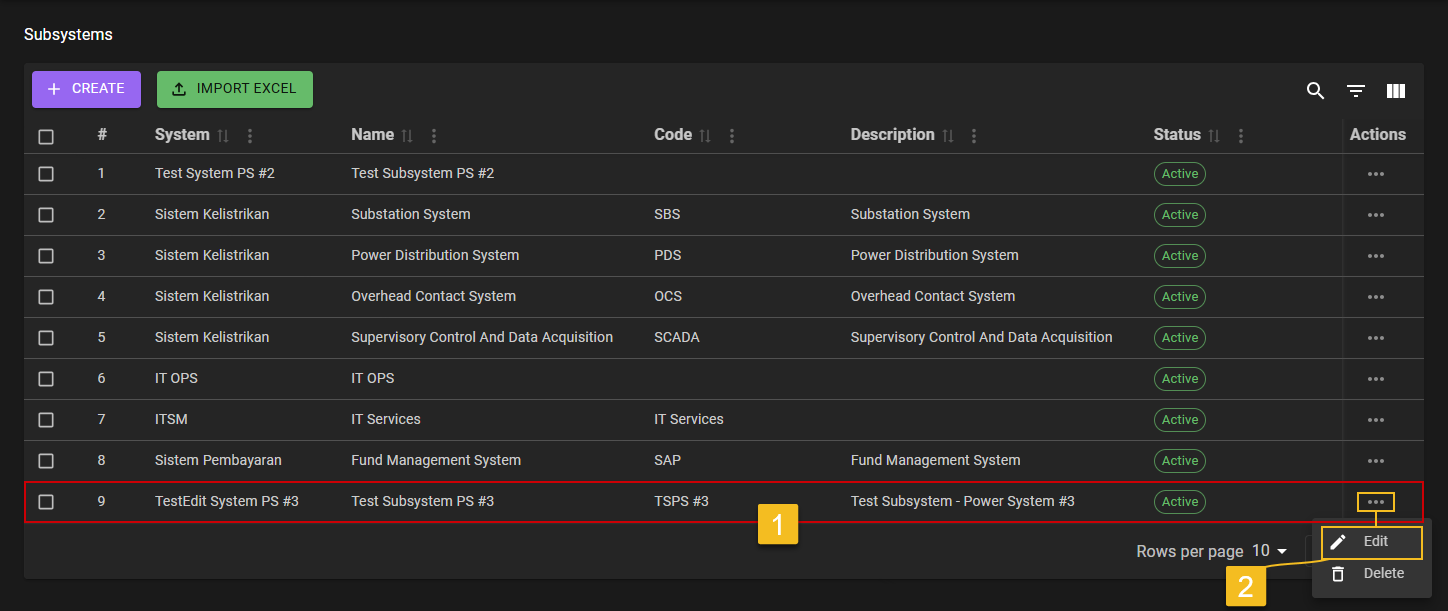
- Super Admin choose on what
Subsystemneeds to be edited. - After clicking on the
Three-Dotaction menu Super Admin then can click on theEditaction menu.
2. Choose What Field Need to Edit
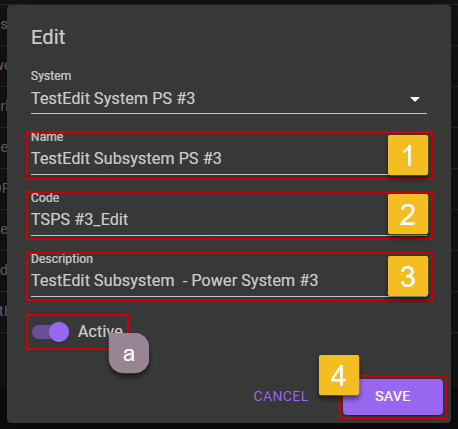
- Super Admin casn edit the
Subsystemwhere it needed. - Super Admin casn edit the
Subsystemwhere it needed. - Super Admin casn edit the
Subsystemwhere it needed. - If Super Admin already make sure that the data inputed correctly, Super Admin can click on the
Savebutton.
Extra:
a. Deactivate Subsystem
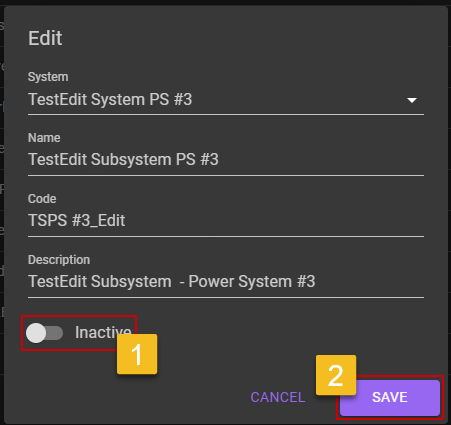
- Super Admin can flick the
Statusswitch to off, if Super Admin want to deactivate theSubsystem.- Super Admin then can click on the
SAVEbutton to saving theSubsystemon anInactivestatus.b. Subsystem Deactivated
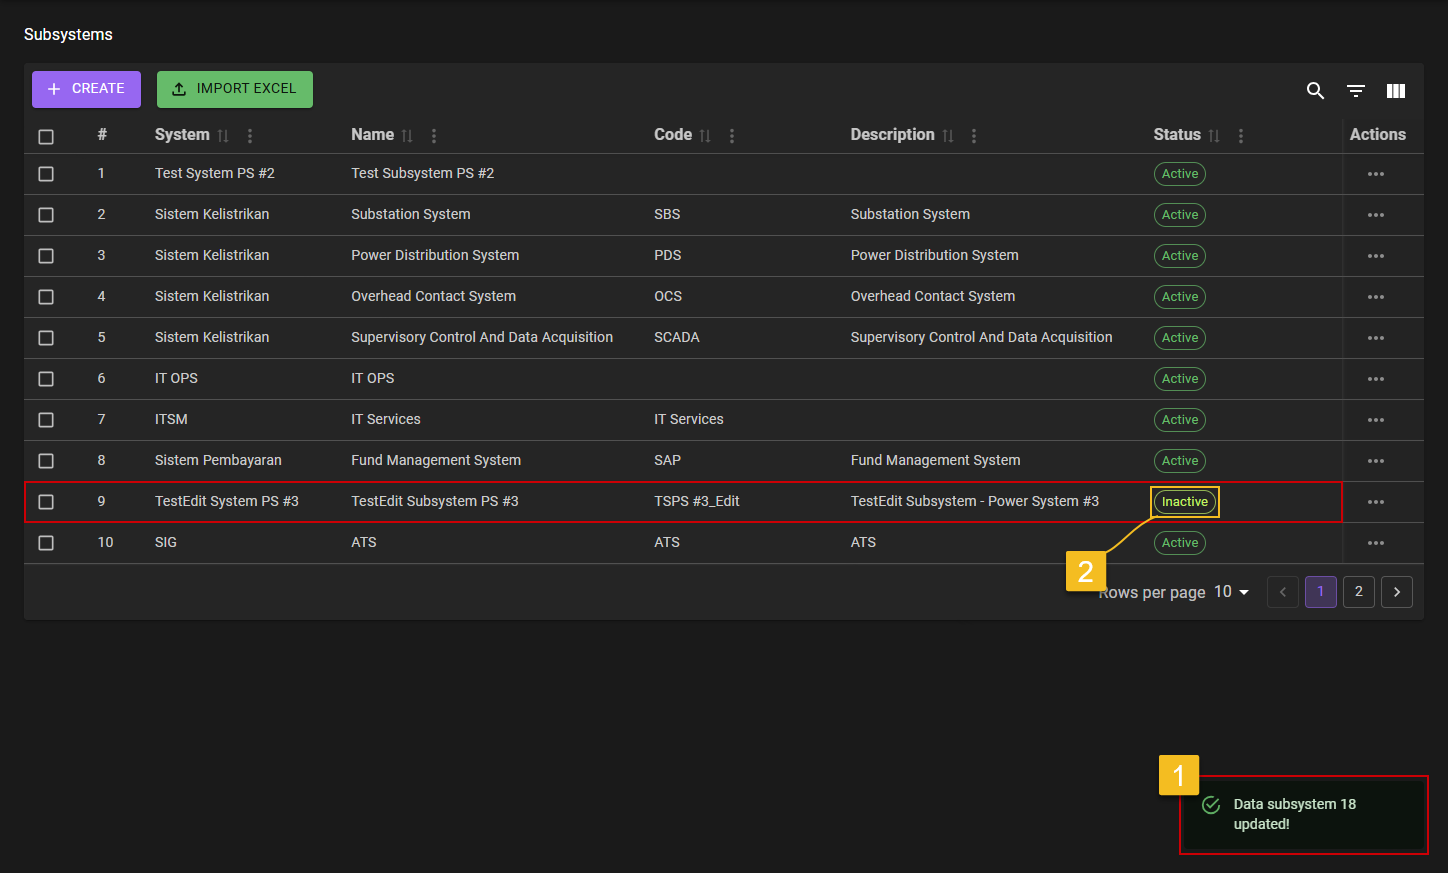
- After Super Admin deactivate the
Subsystem, a notification will come out, which isData subsystem [number] updated!, it means theEditprocess are saved successfully.- To make sure even more, Super Admin can check on the
Statuscolumn of the whichSubsystemto see if it is on anInactivestate.
3. Confirm Edit
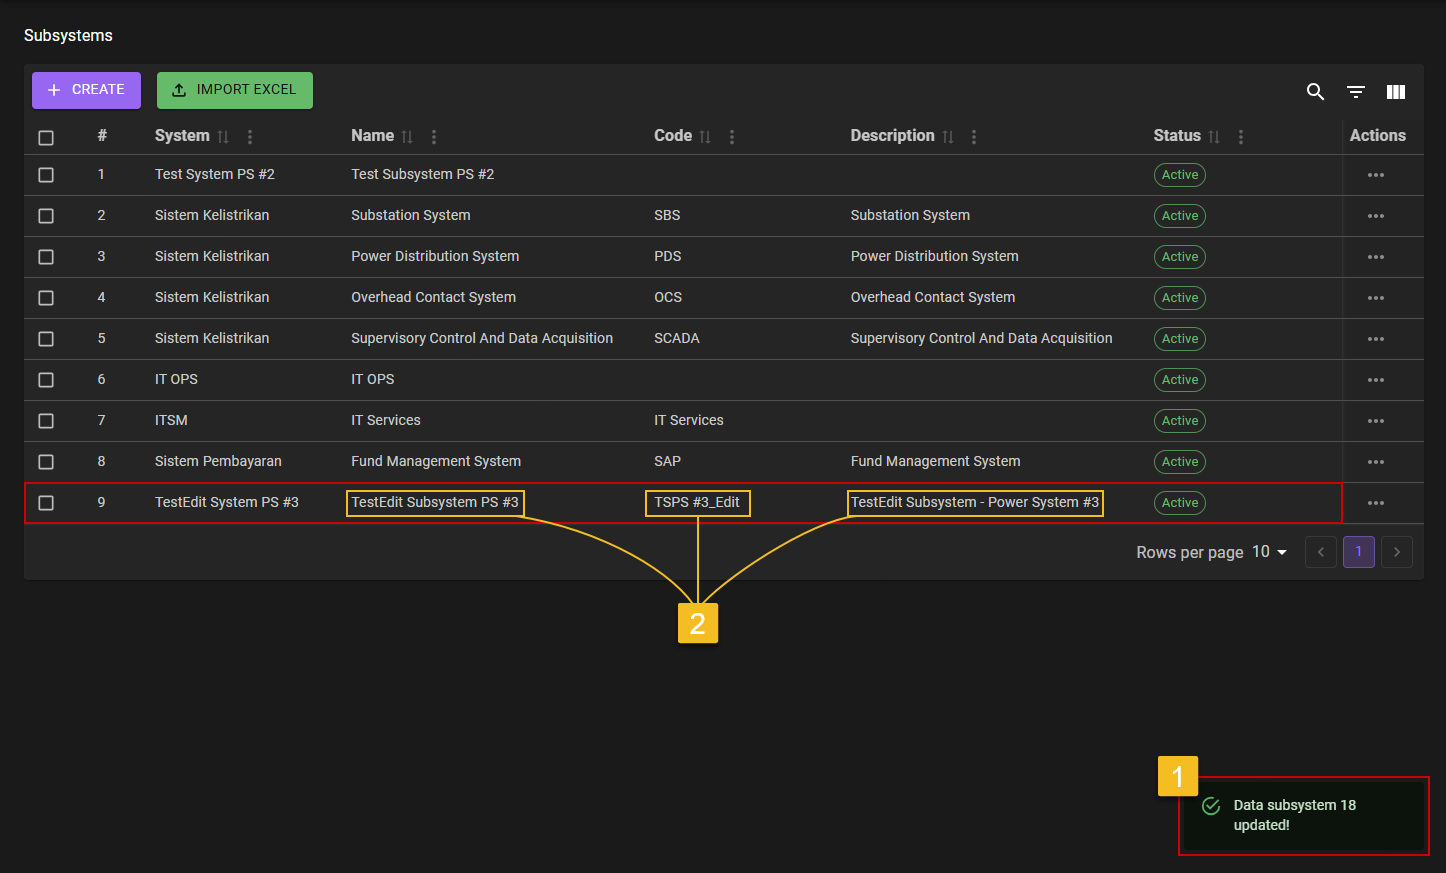
- After Super Admin click the
SAVEbutton, a notification will came out which isData subsystem [number] updated!. - To make sure even more, Super Admin can check on the list of the
Subsystemif the edited part are updated on the list or not.
Delete Existing Sub System
1. Choose Subsystem That Need to Delete
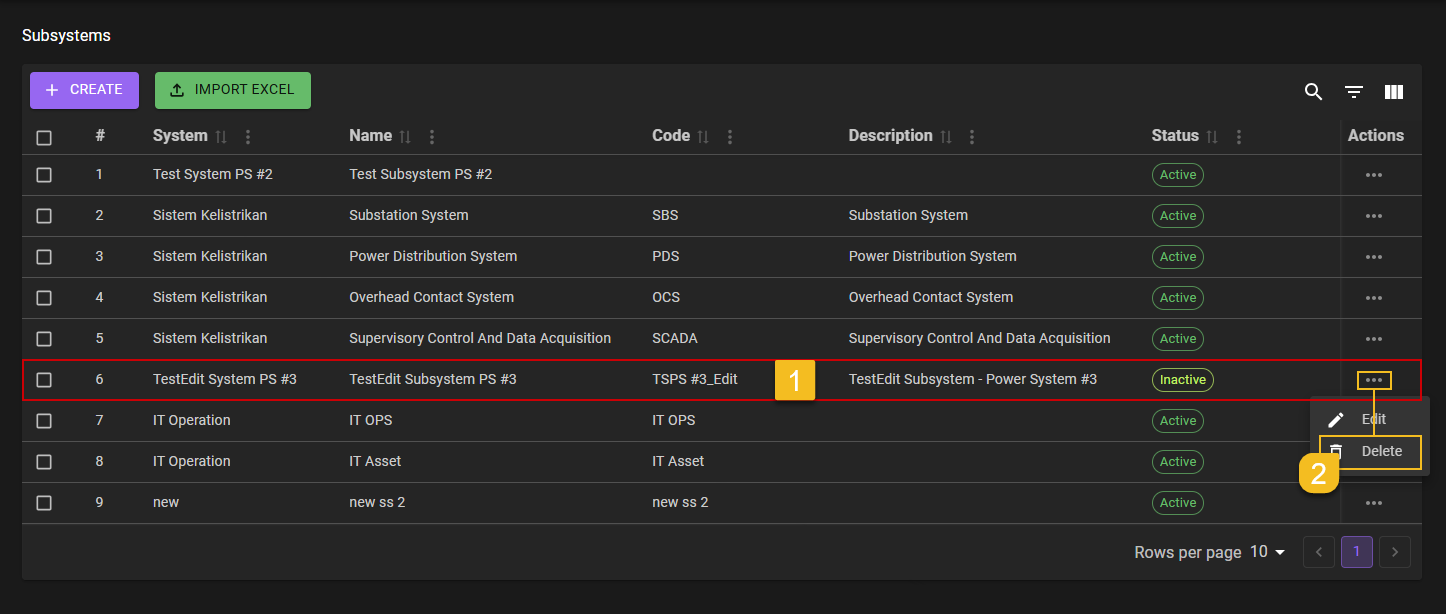
- Super Admin choose on which
Subsystemneeds to be delete. - After clicking on the
Three-Dotaction button Super Admin then can click on theDeleteaction menu.
2. Delete Subsystem
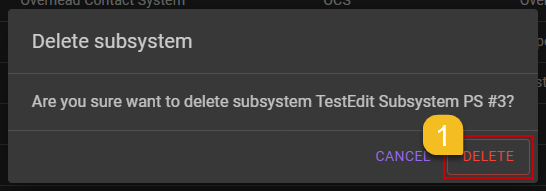
- After clicking on the
Deletebutton, a confirmation popup will shown. Super Admin can chooseDELETEbutton to confirming it.
3. Confirm the Deleteion of Subsystem
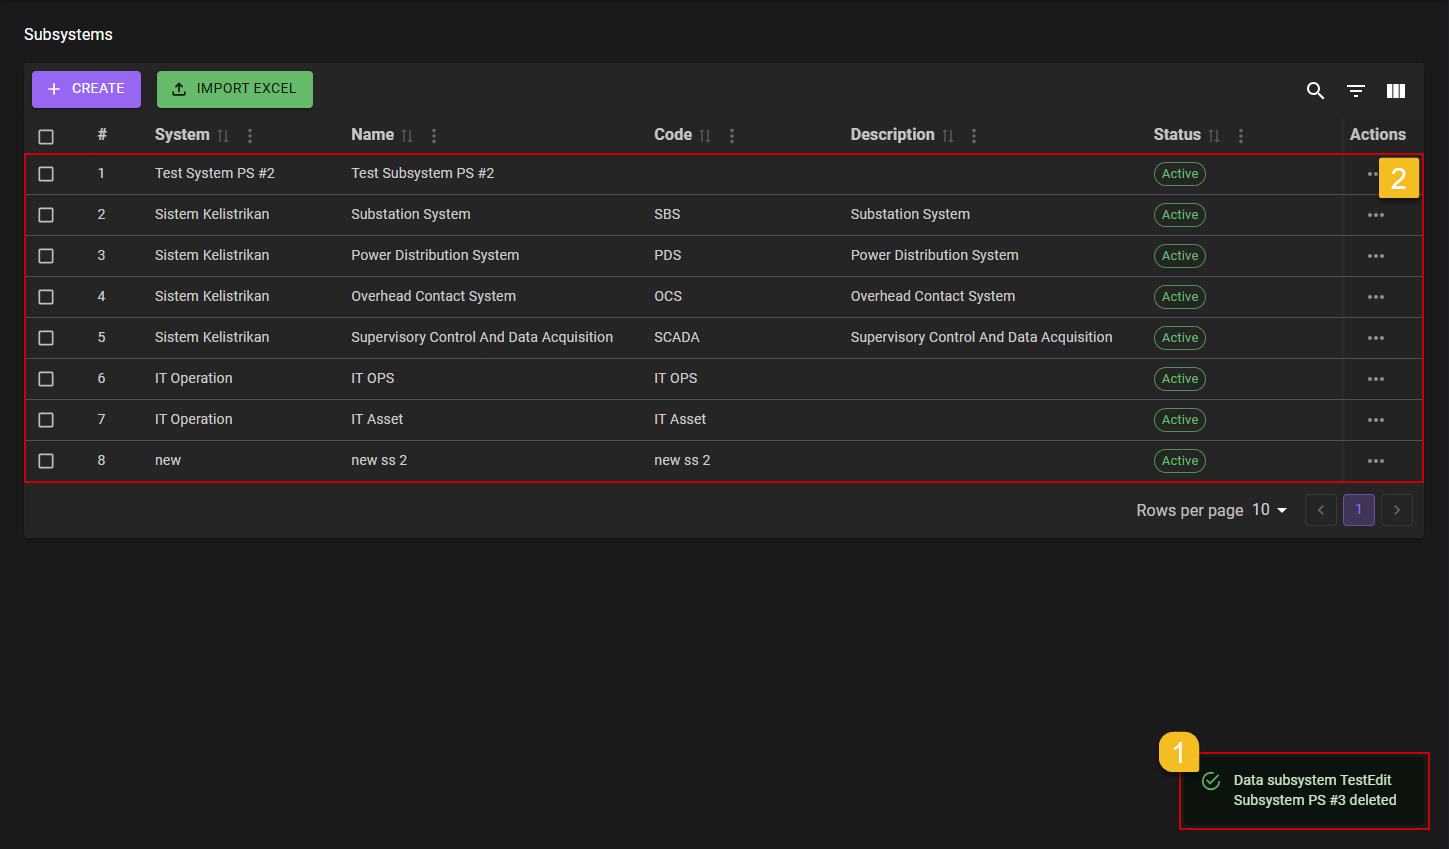
- Super Admin will got notification
Data subsystem [subsystem_nave] deleted!. - Super Admin can check on the list, if the deleted part still on the list or not.